7. Creating a Karmik (Playlist), Tag Mechanism, Setting Restrictions
Published on: July 5, 2024
Last edited on: April 15, 2025
A Karmik is a numbered list of Components (content: videos, audio, images; data: widgets, documents; control commands) uploaded from the Library or directly into the Karmiks. These will be played in a specific sequence with defined rotation parameters (for content) or used to control the device (data, control commands).
7.1. Go to: Main Menu - Karmiks
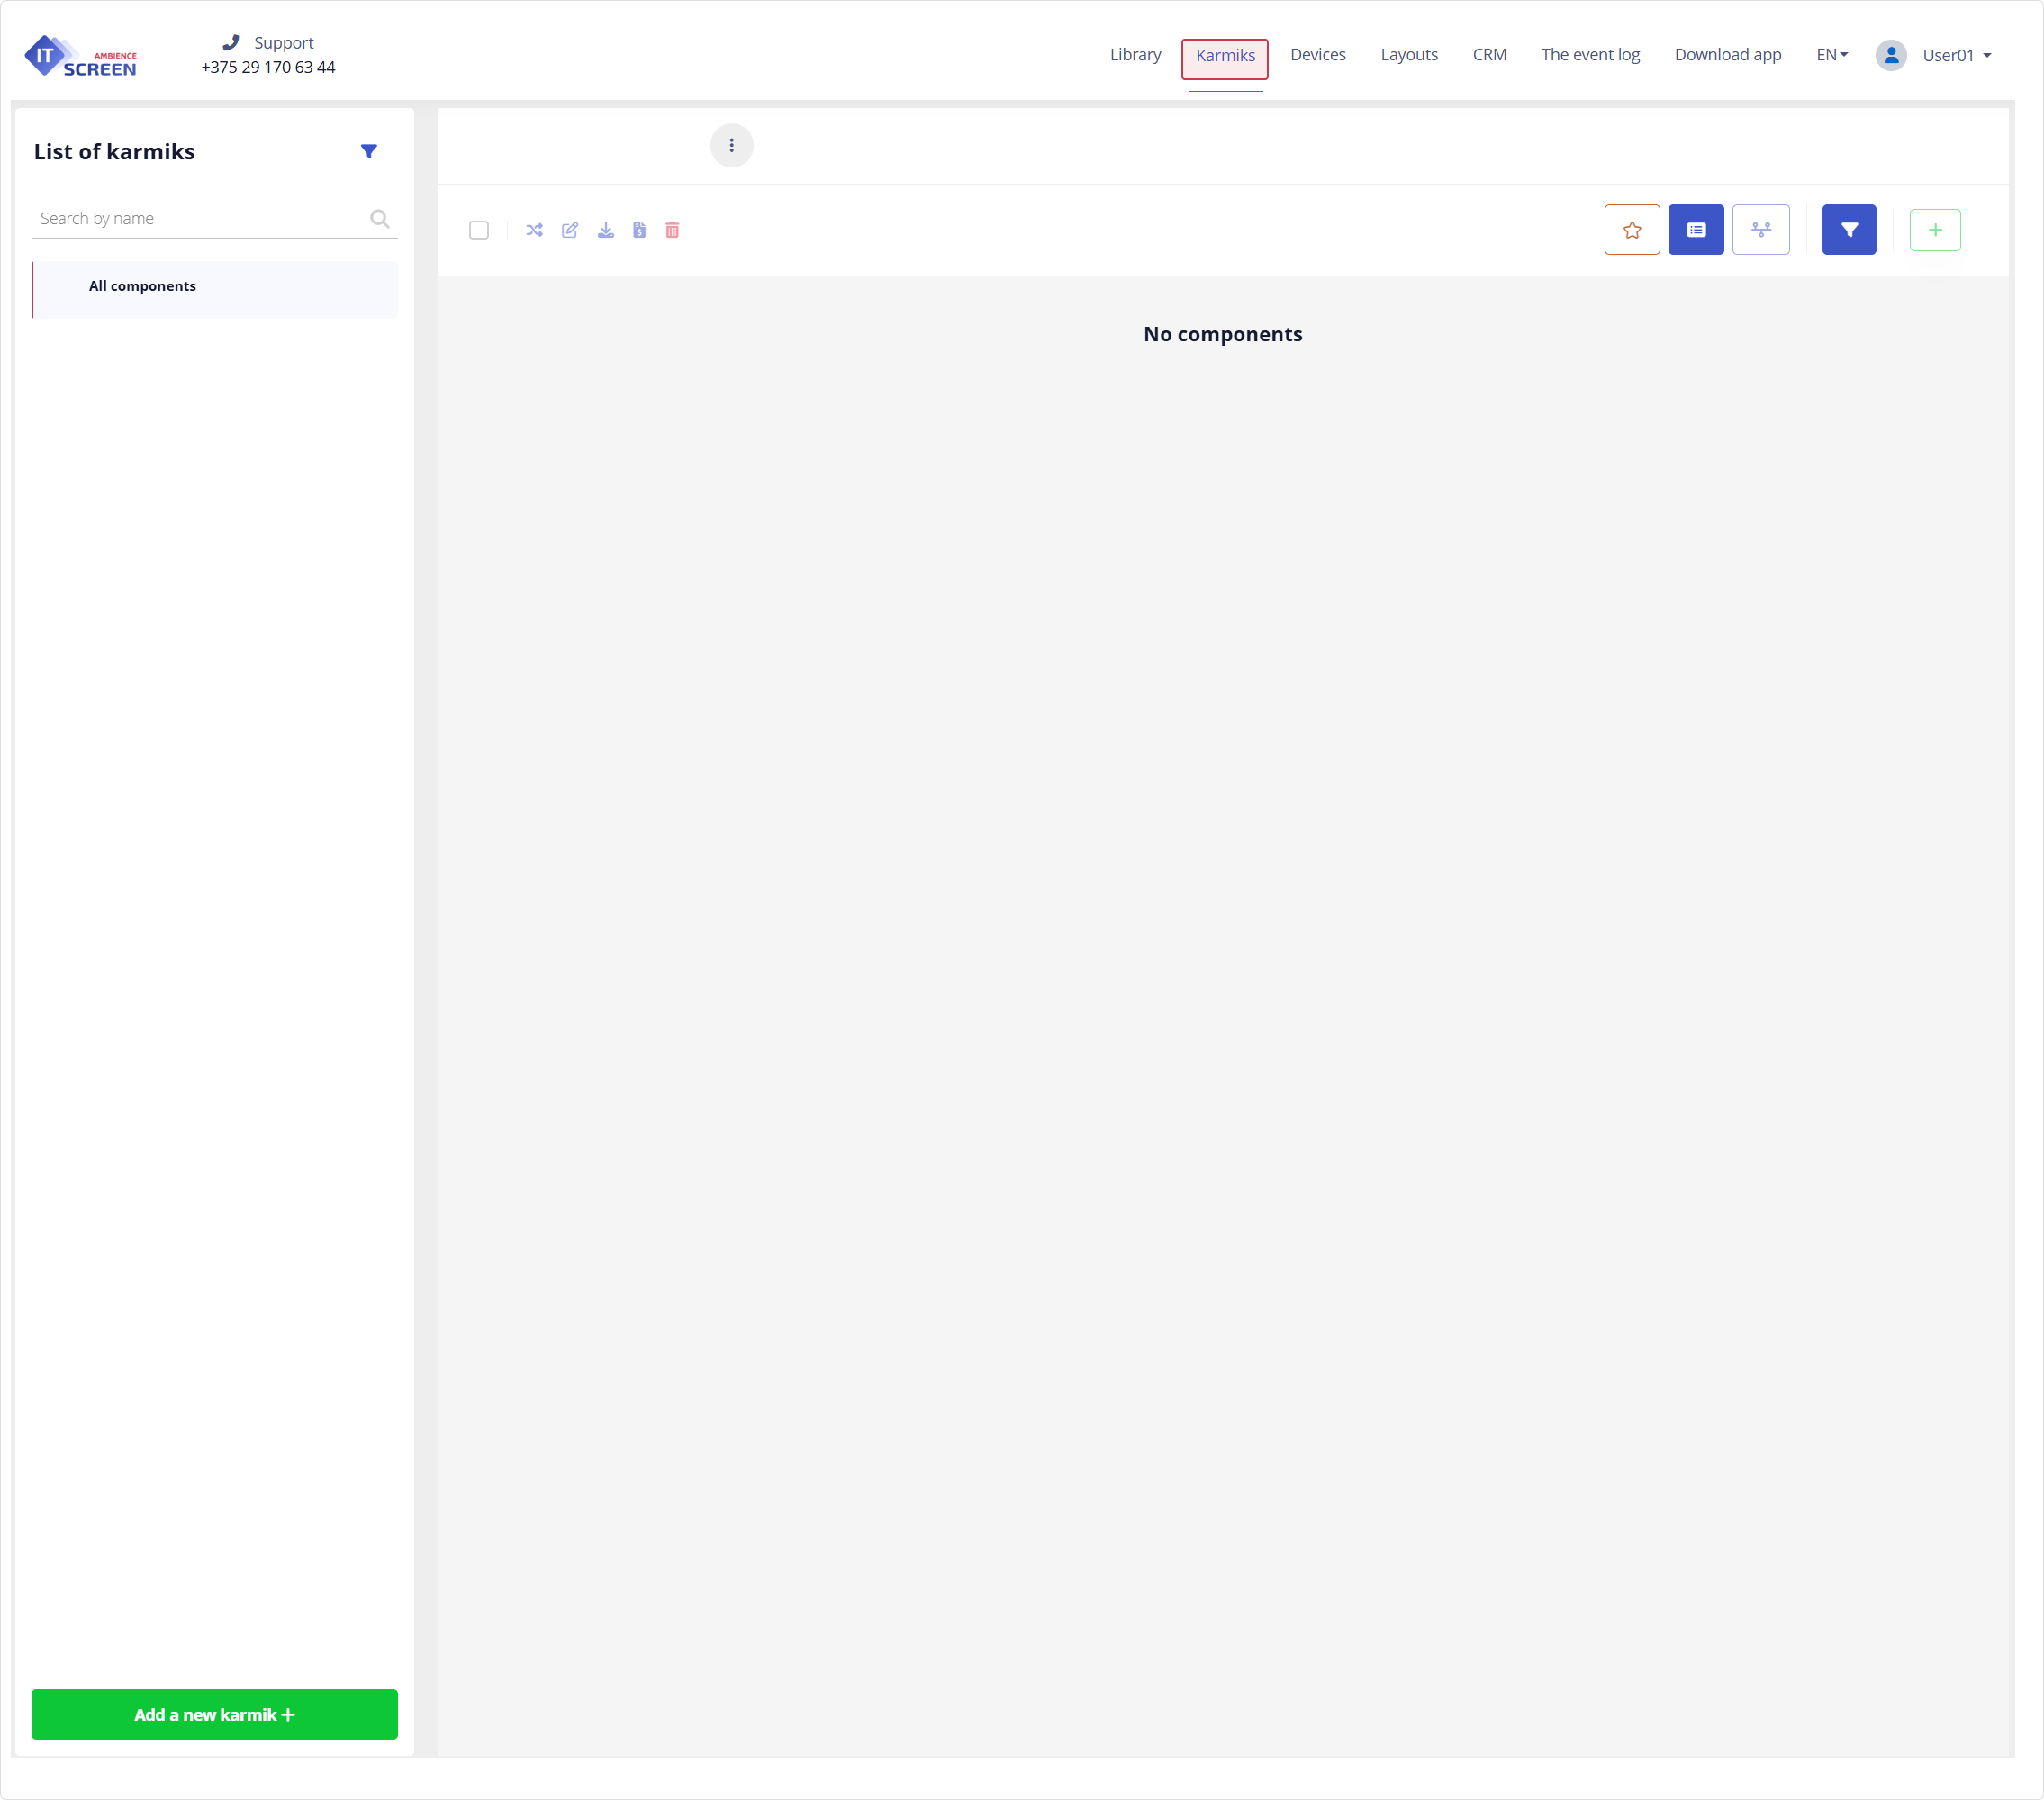
7.2. Creating a new Karmik
Click the button and enter the Karmik name.
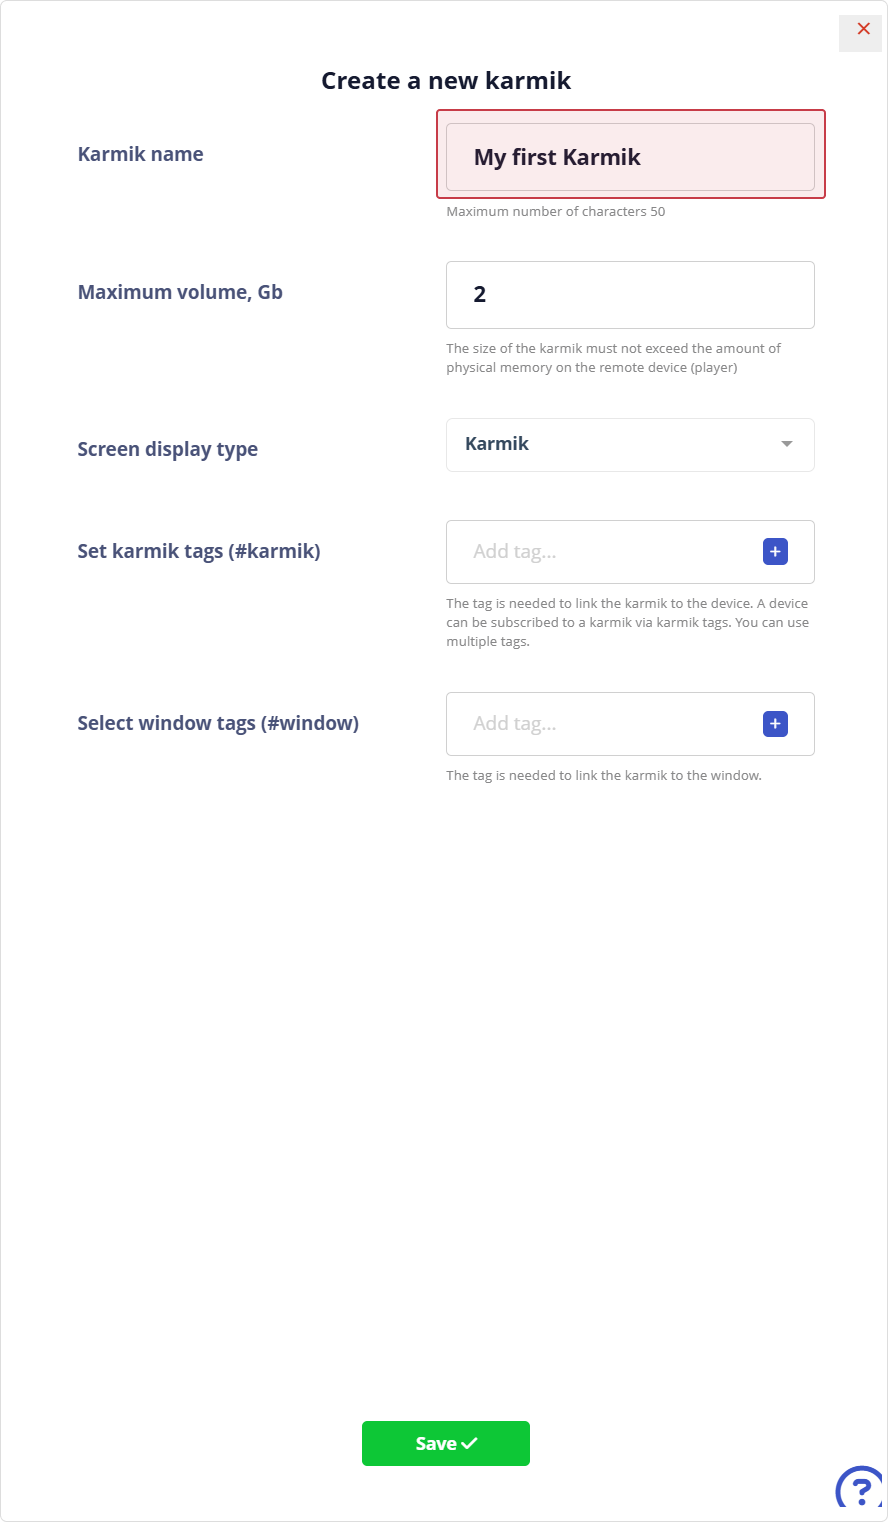
Click the button
If tags for the Karmik (#karmik) and the window (#window) exist, add them in the appropriate fields. If not — leave the fields empty. Maximum size allowed is 2Gb.
7.3. Adding components to the Karmik
Click the button then click
Use checkboxes to select the required components.
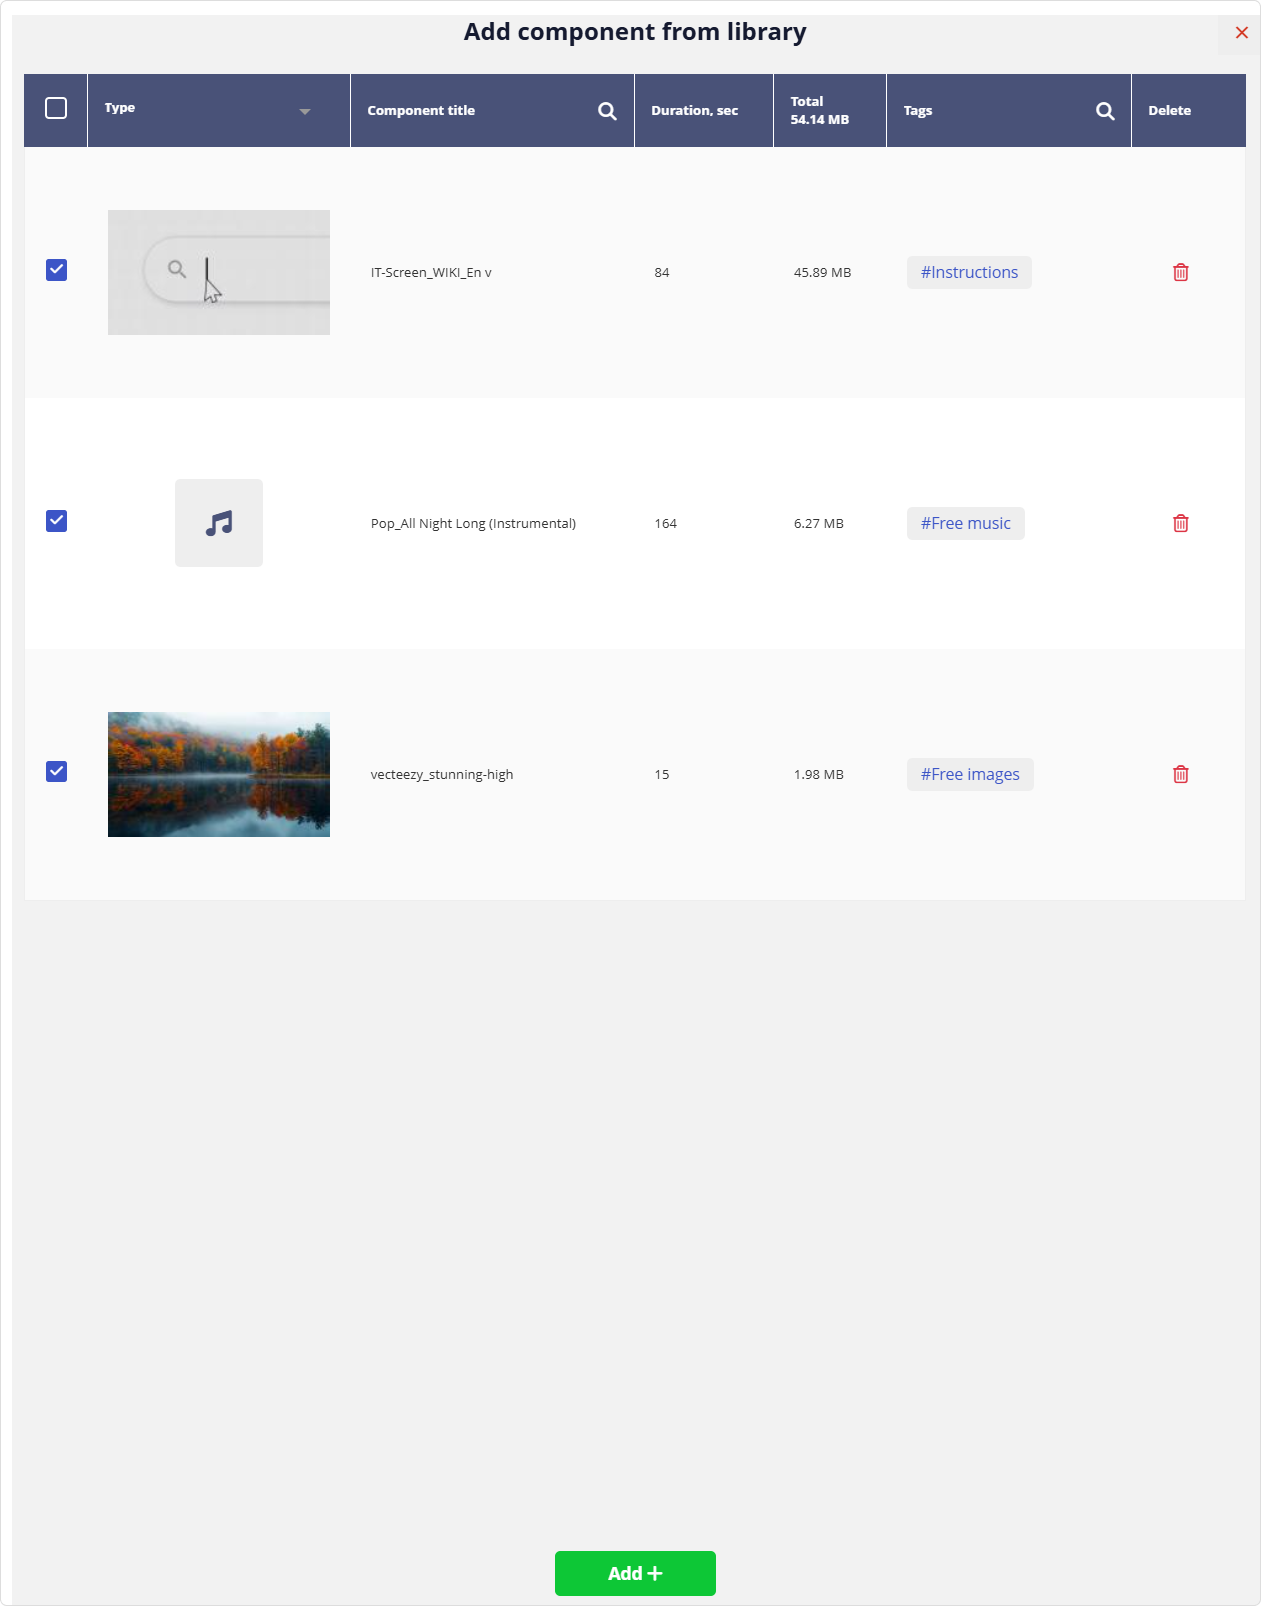
Click the button
Once the upload is complete, the components will appear in the Karmik.
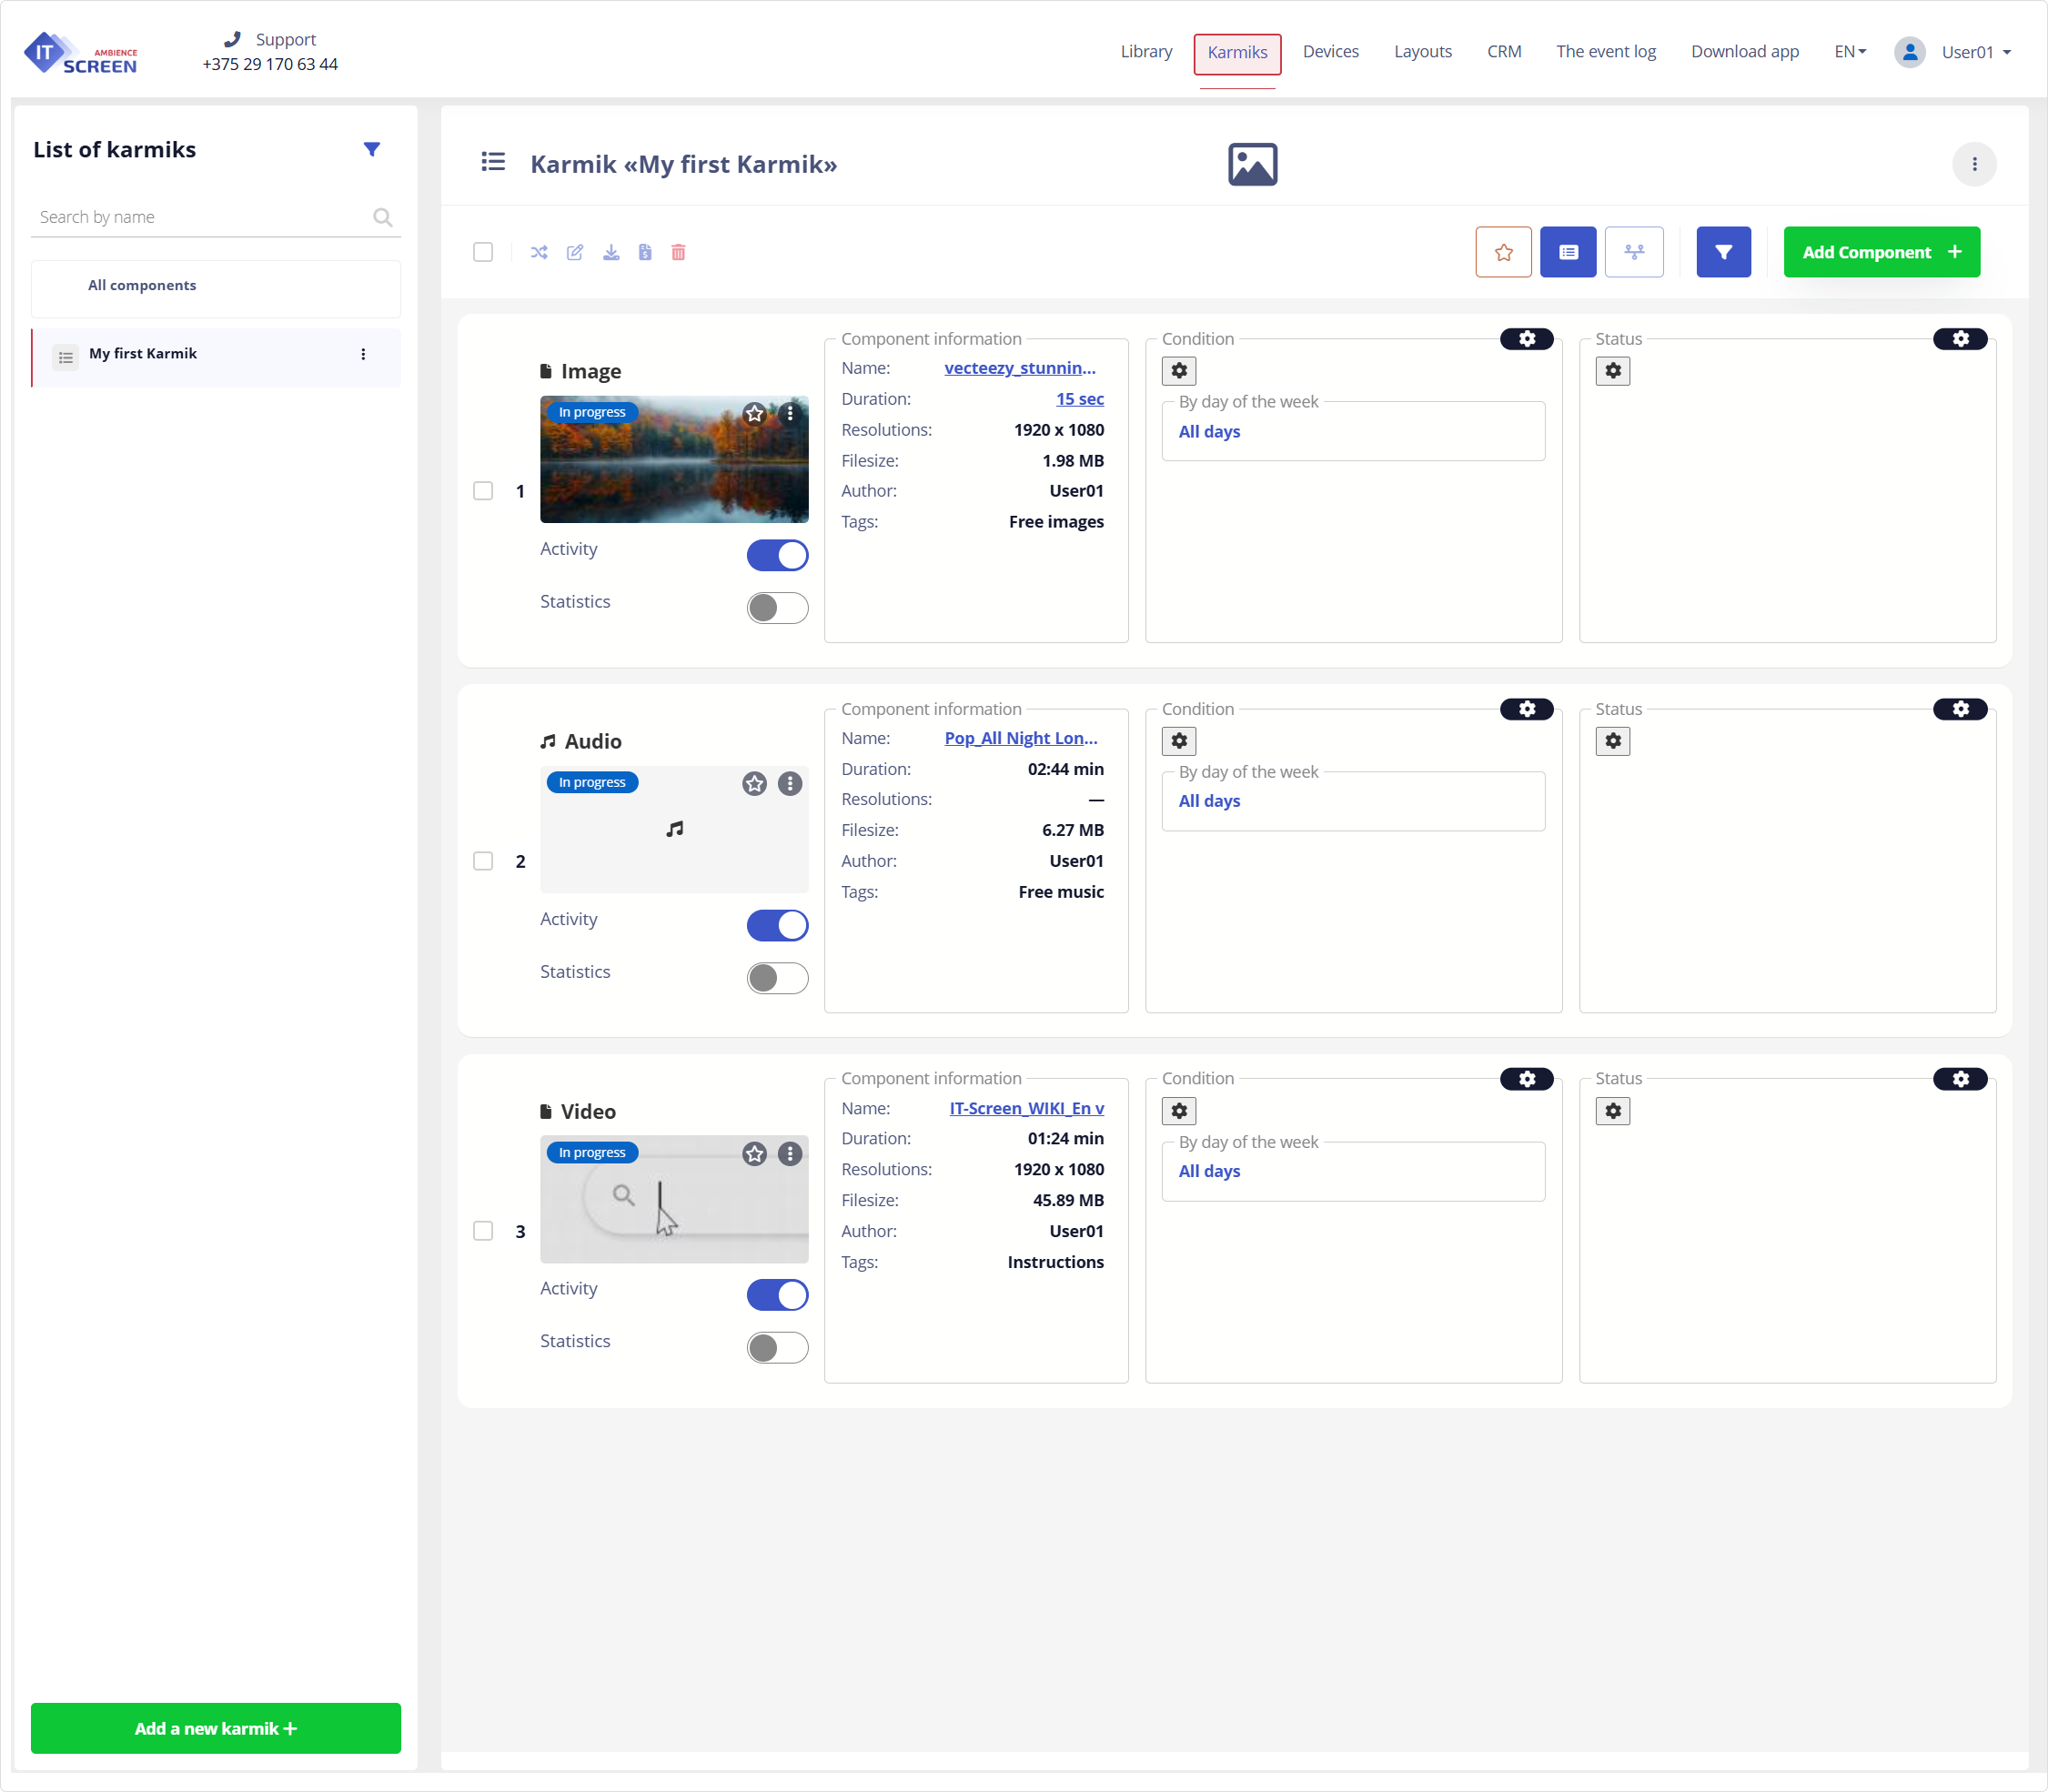
7.4. Creating and assigning a Karmik tag
The tag mechanism allows for a flexible way to subscribe devices to karmiks. In simple cases, you can subscribe all devices to one karmik, and/or one device to multiple (unlimited) karmiks.
7.4.1 Creating a Karmik tag
Click the — Kebab menu (more options menu) in the top-right corner of the main Karmiks window.
From the menu list, select –

In the Karmik Tags area, click the "edit" icon .
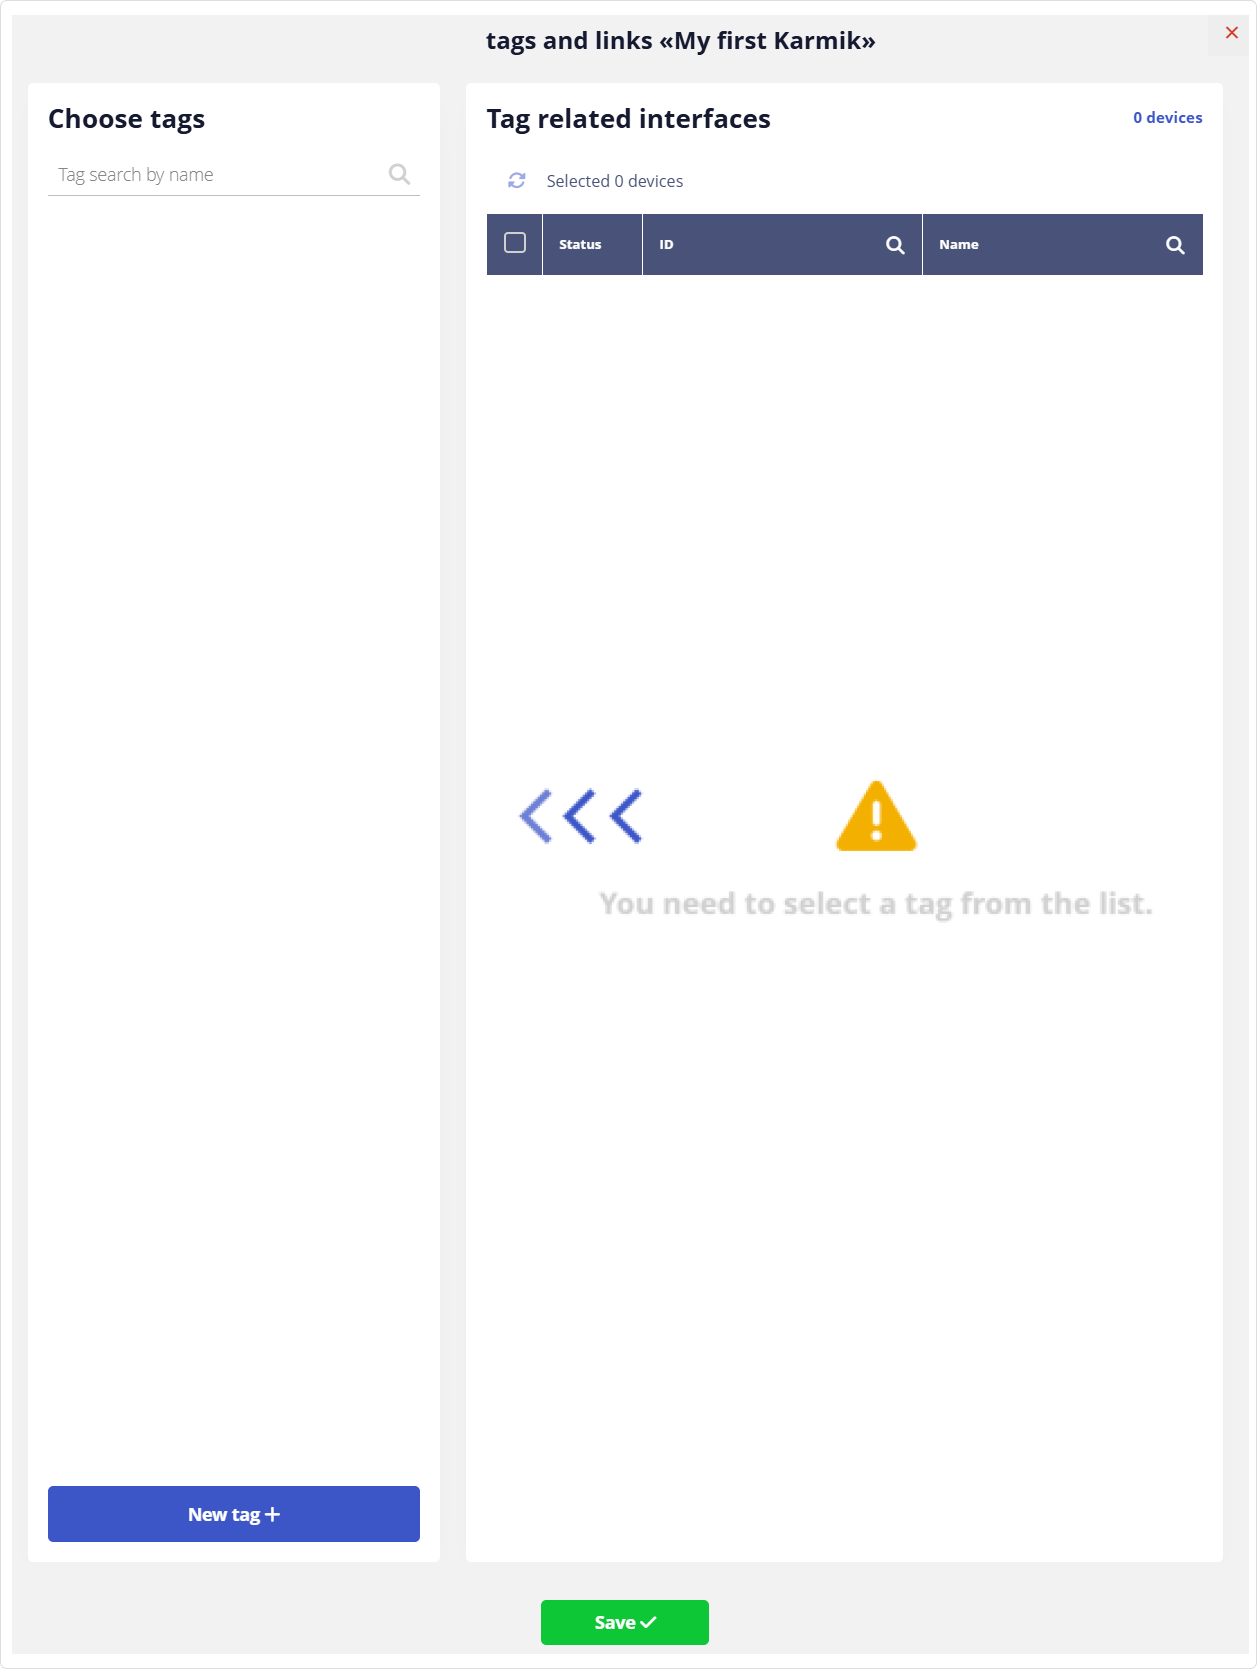
In the popup Karmik Tags and Links window, click the button
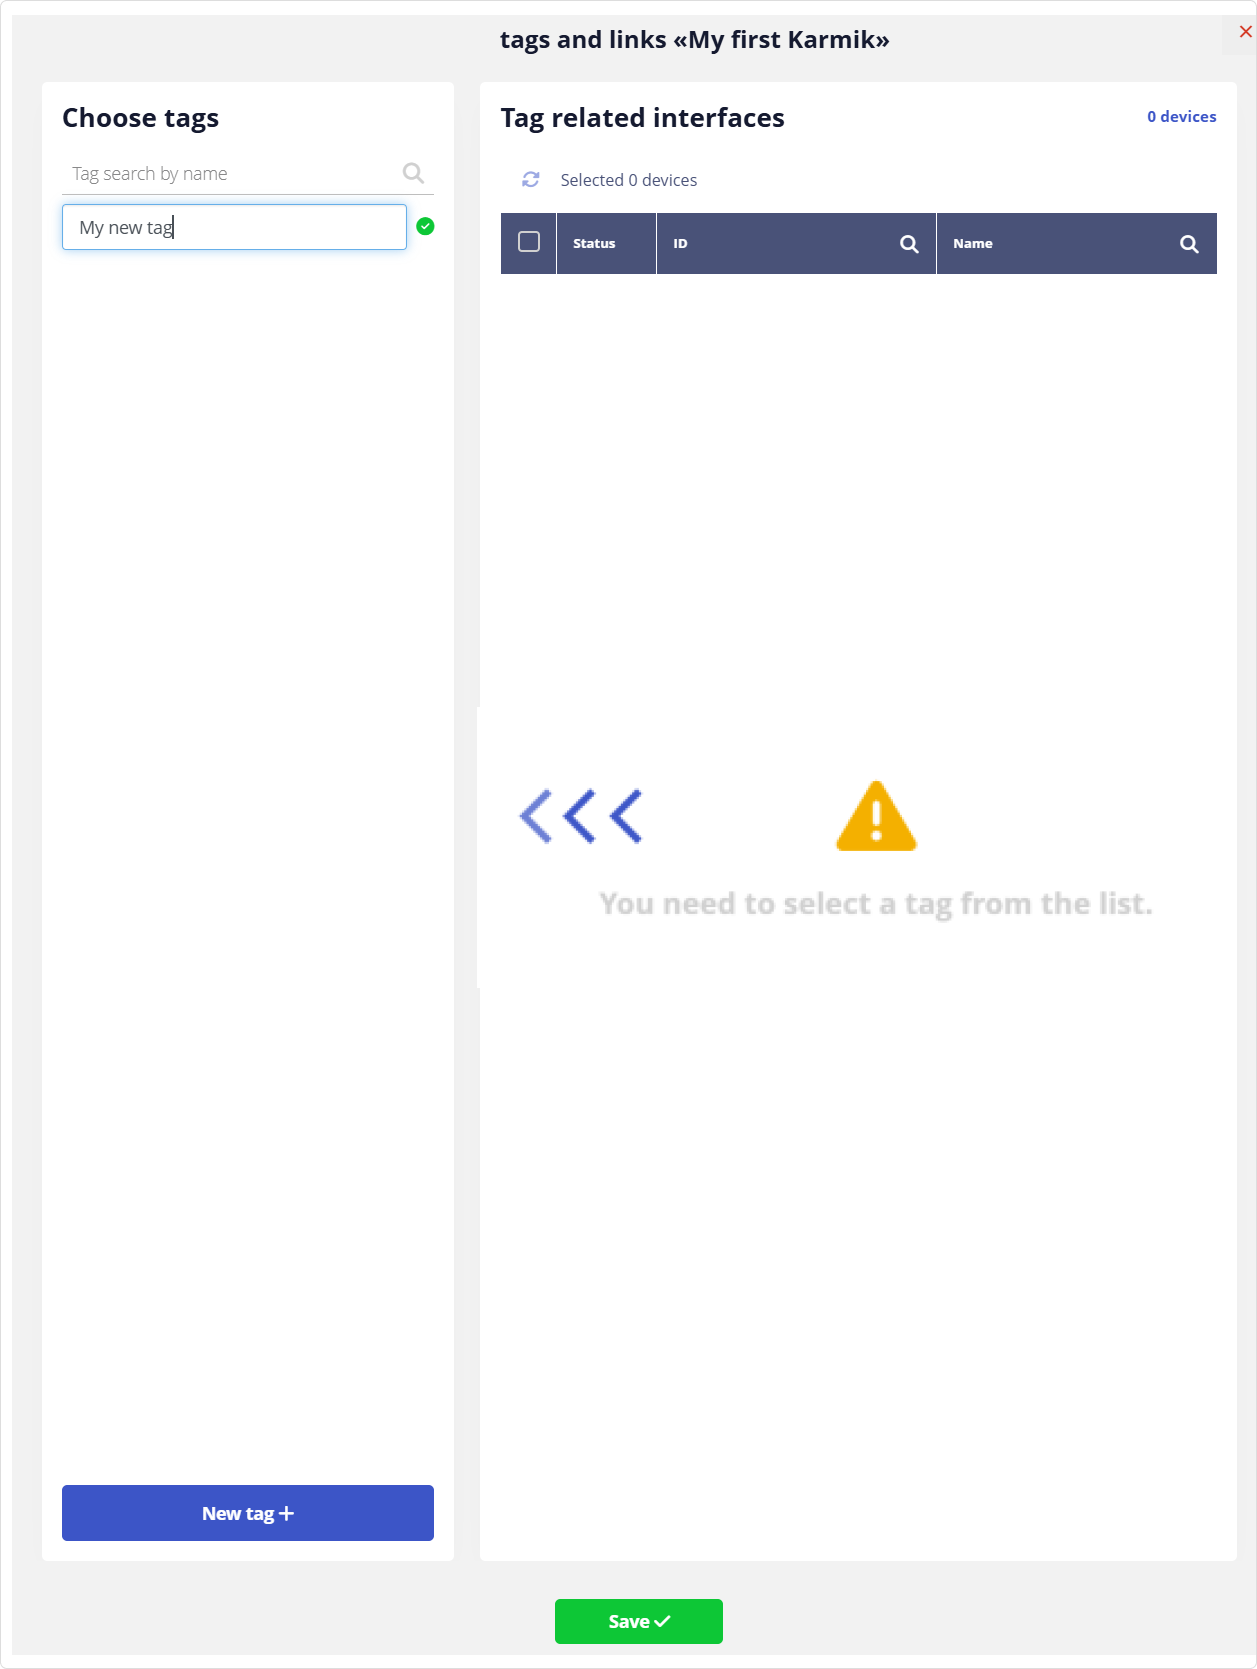
Enter the tag name and click the button
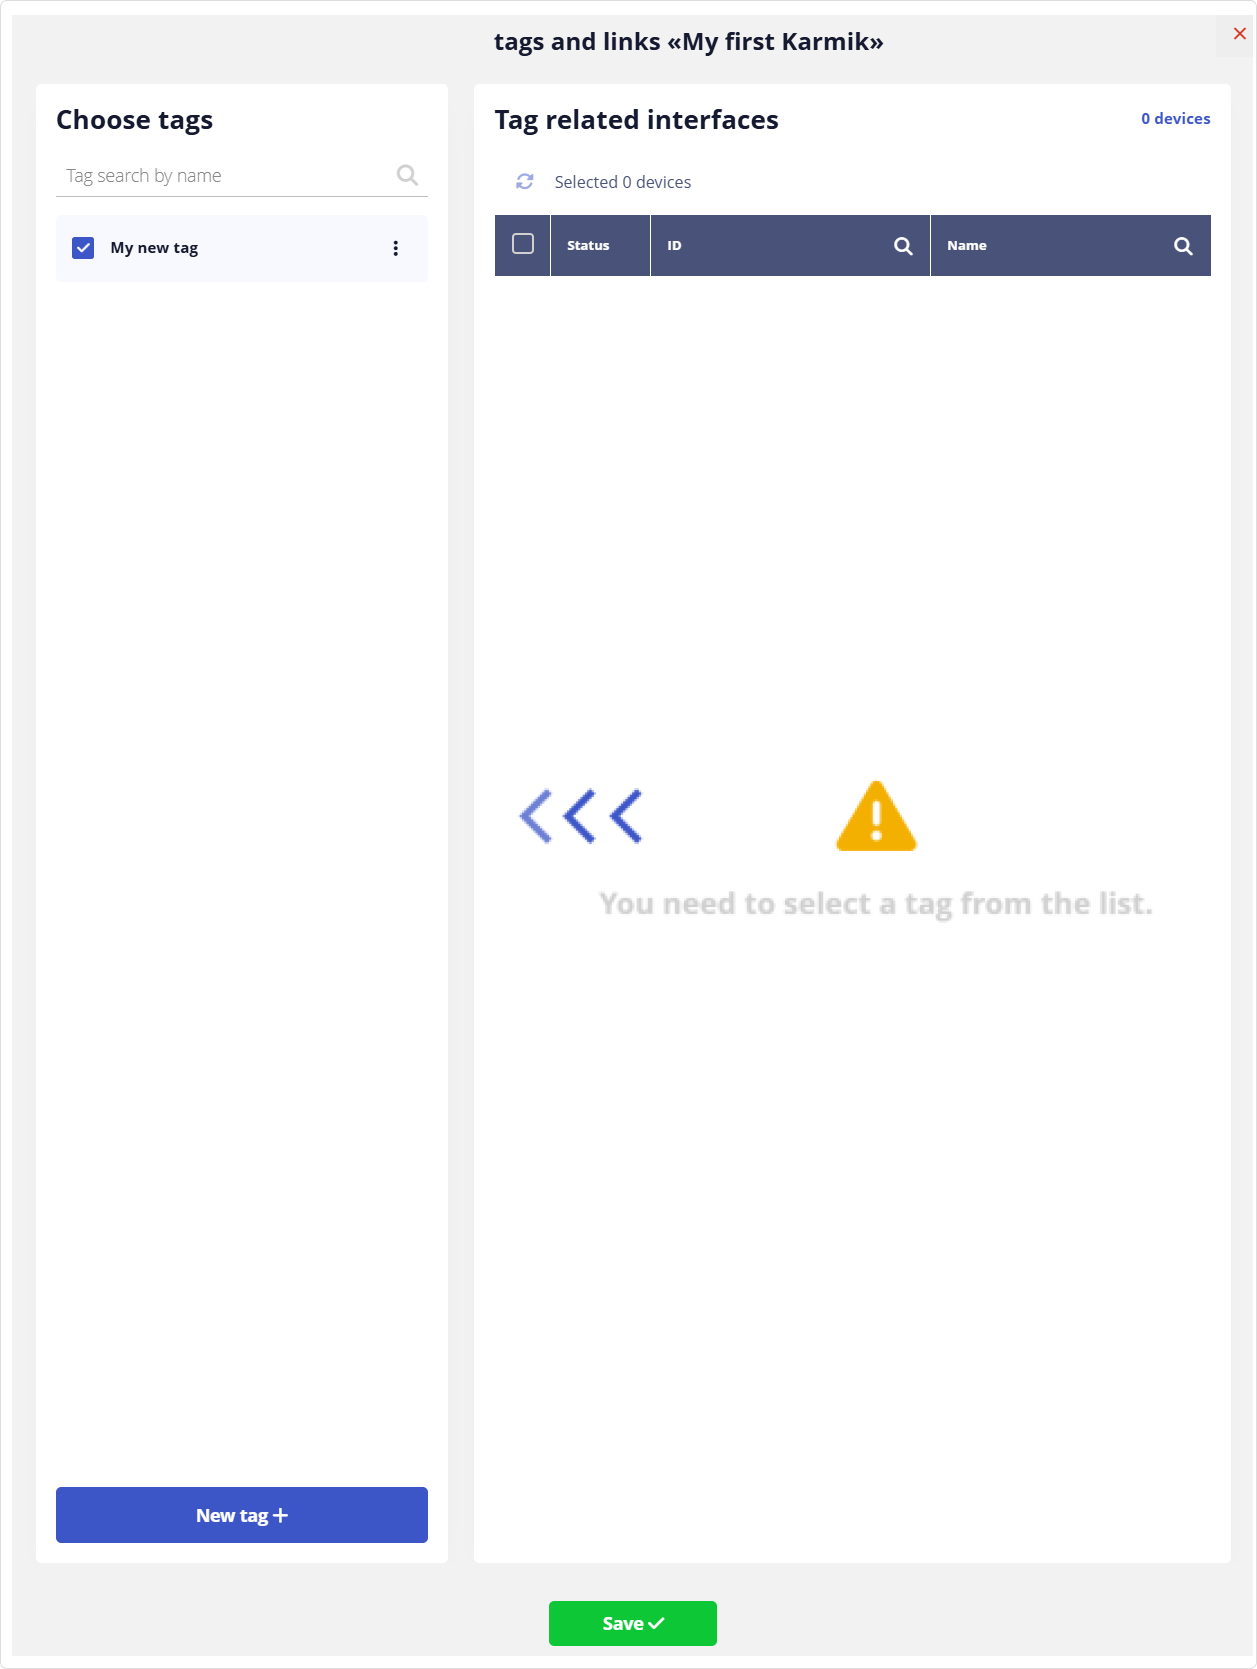
Check the created tag and click the button
The Karmik is now linked to the created tag.
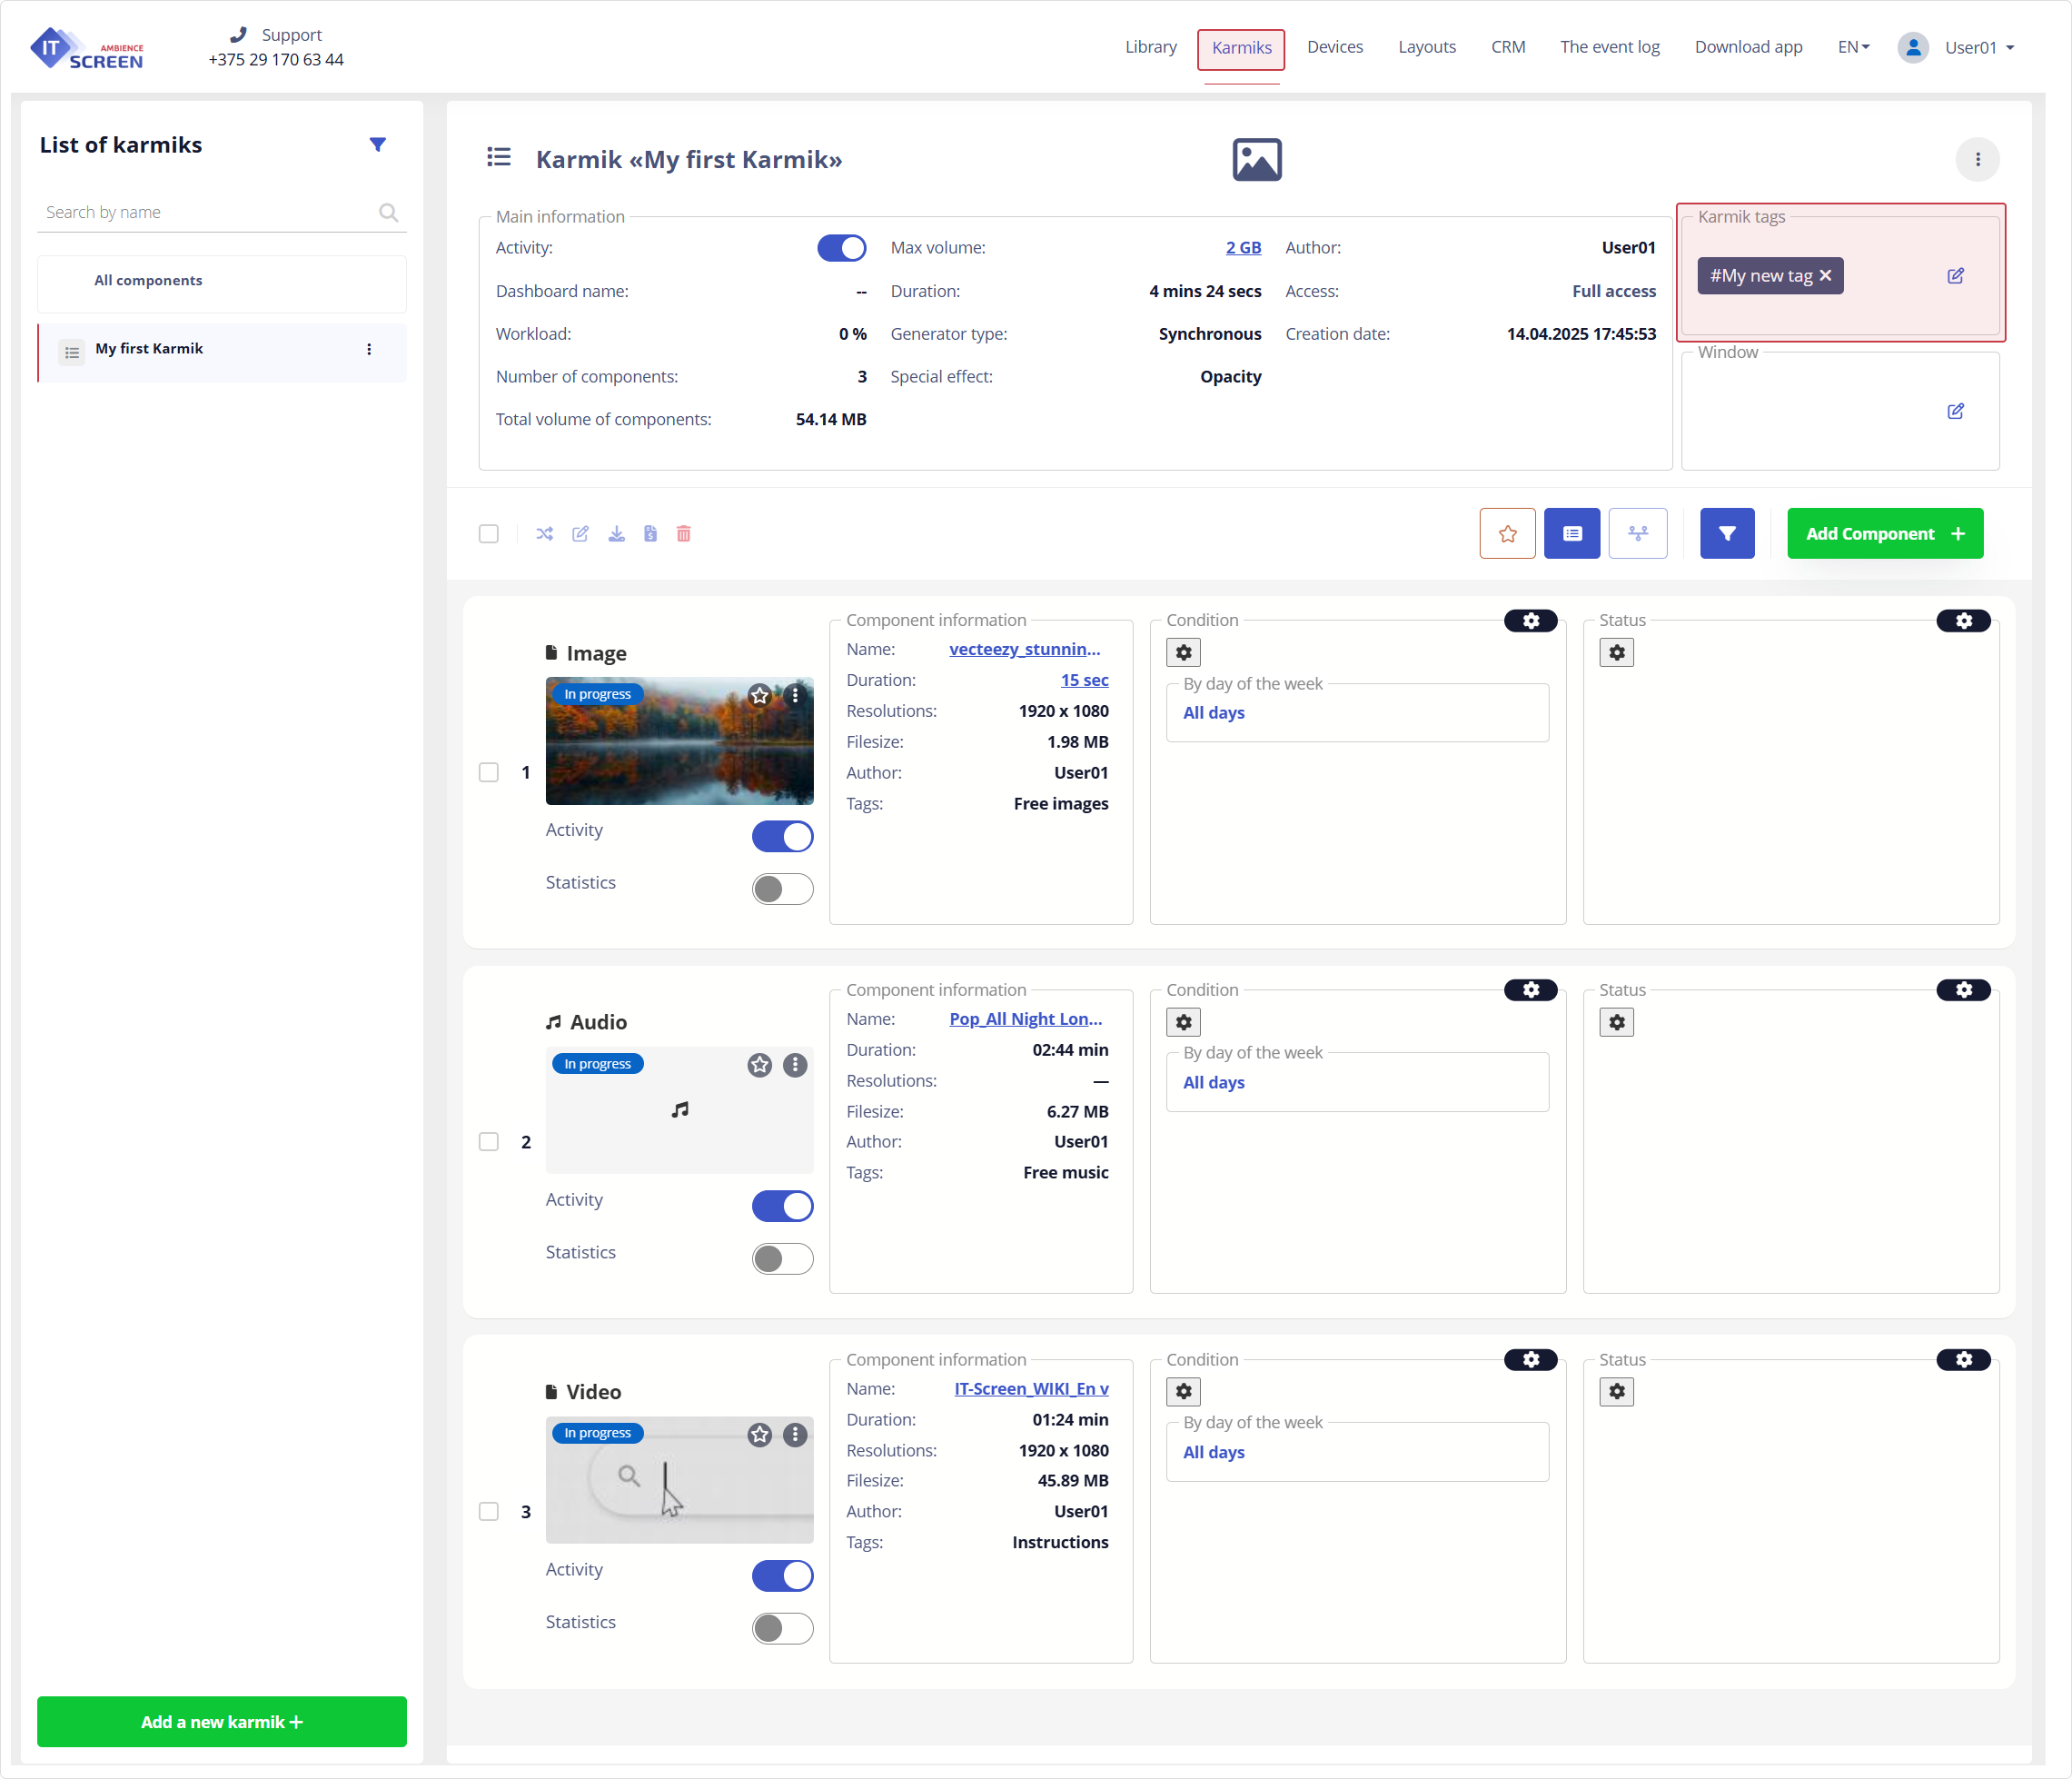
If you already have existing tags, you can assign them to the Karmik. For proper content playback, the Karmik must have at least one tag assigned (the field must not be empty).
7.4.2 Assigning a Window tag
Before assigning a window tag to the Karmik, the tag must be created. Tag creation is described here.
In the Window Tags area, click the "edit" icon .

In the Window List popup, select the appropriate window tag by checking it, then click the button
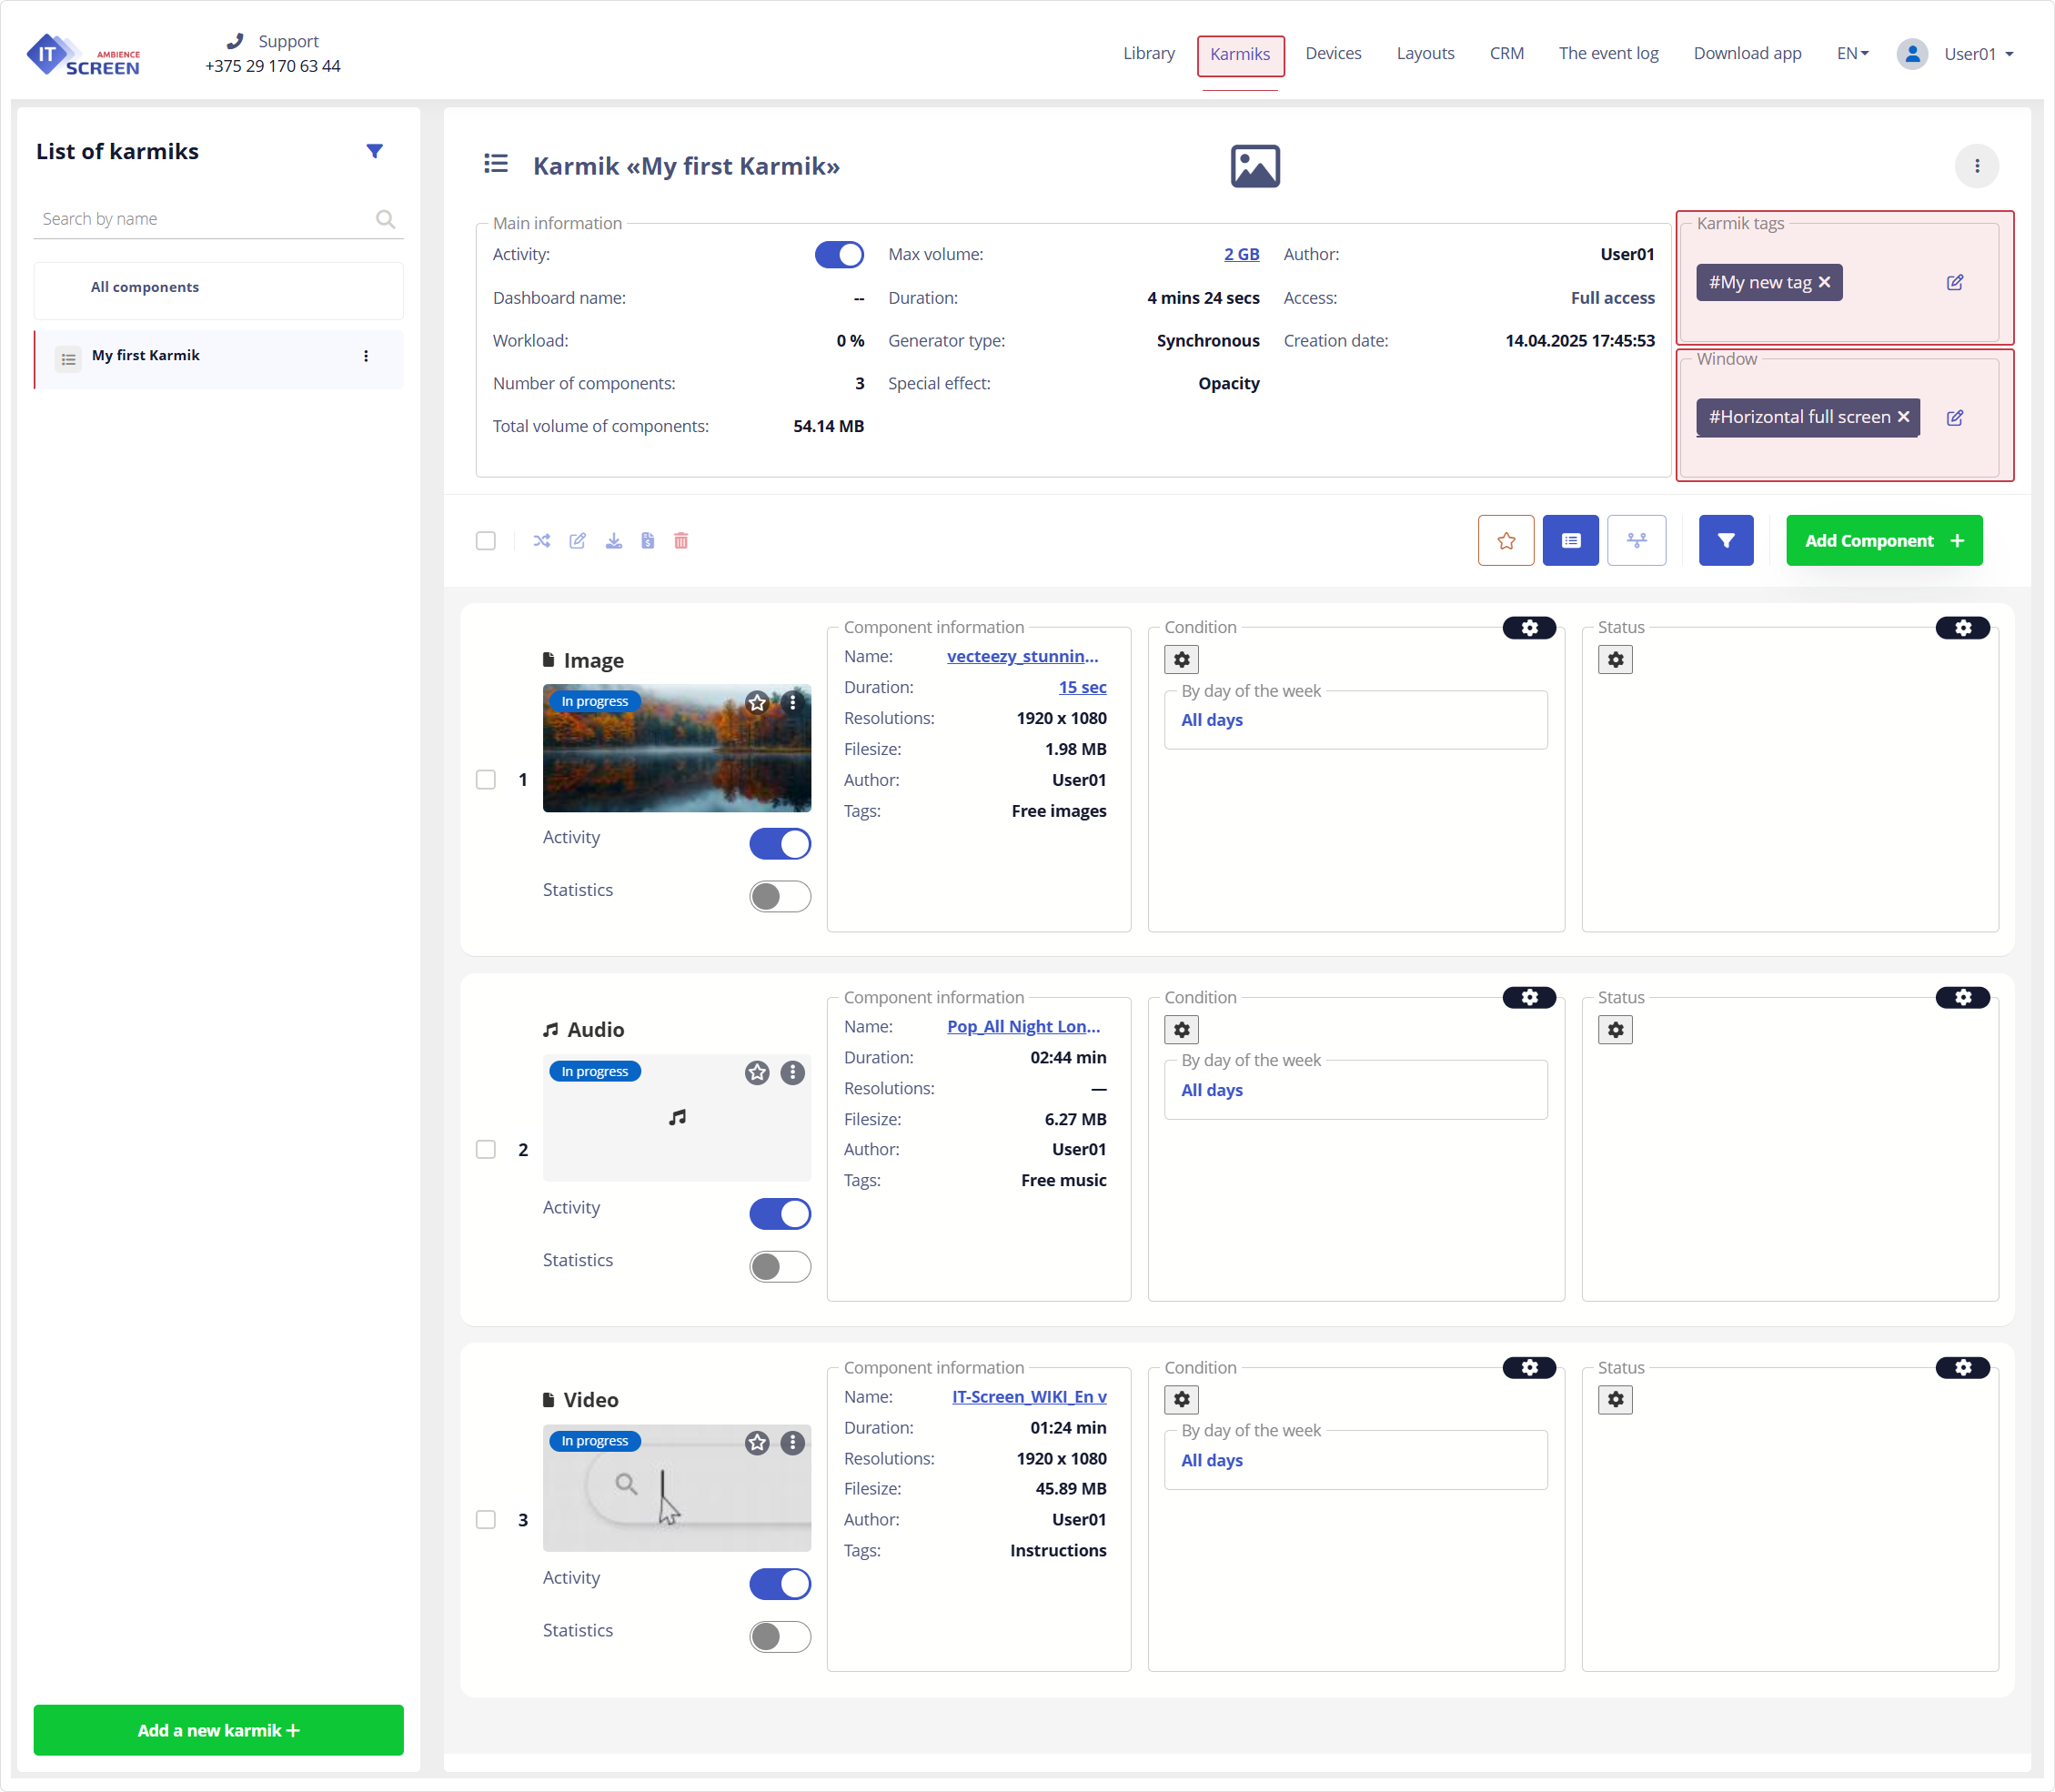
All additional component rotation settings in the Karmik are described in the Karmiks (Playlists) section.
Congratulations! You can now proceed to 8. Subscribing Devices to a Karmik (Playlist)