Cash Register Services (CRS)
Publication date: February 12, 2025
Last edited: June 30, 2025
(Added: use of dynamic windows)
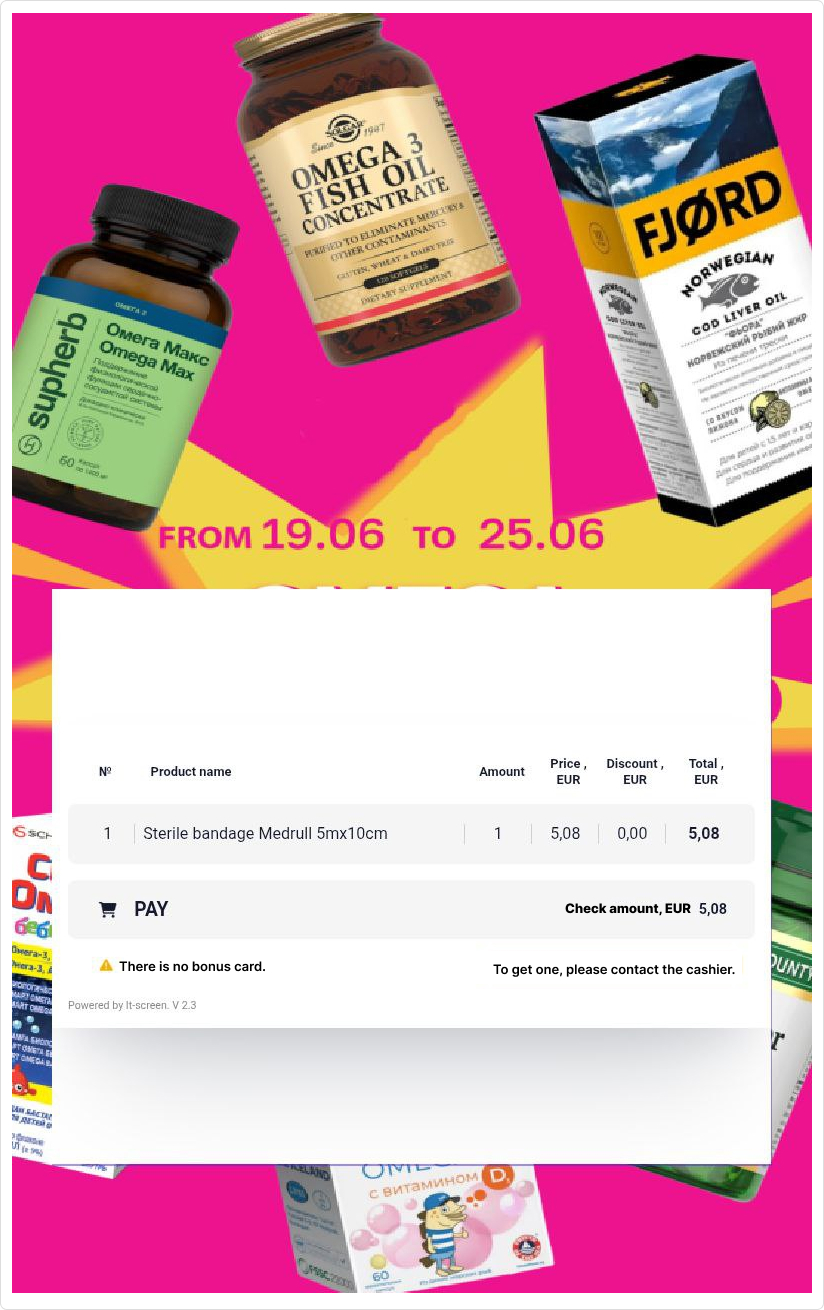
The CRS widget is part of the dynamic remote media content management system, designed to display to customers information about product (or service) names, transaction amounts processed through the cash register, and other data. This ensures transparency in trade transactions.
Dynamic Media Content Management
Dynamic Media Content Management is a technology for remotely updating the information displayed on screens, including images, names, prices, descriptions, and other parameters. Changes occur automatically via the client’s automated workstation, without the need to reprepare and upload content, enabling responsive and flexible control.
Example of Dynamic Media Content Management
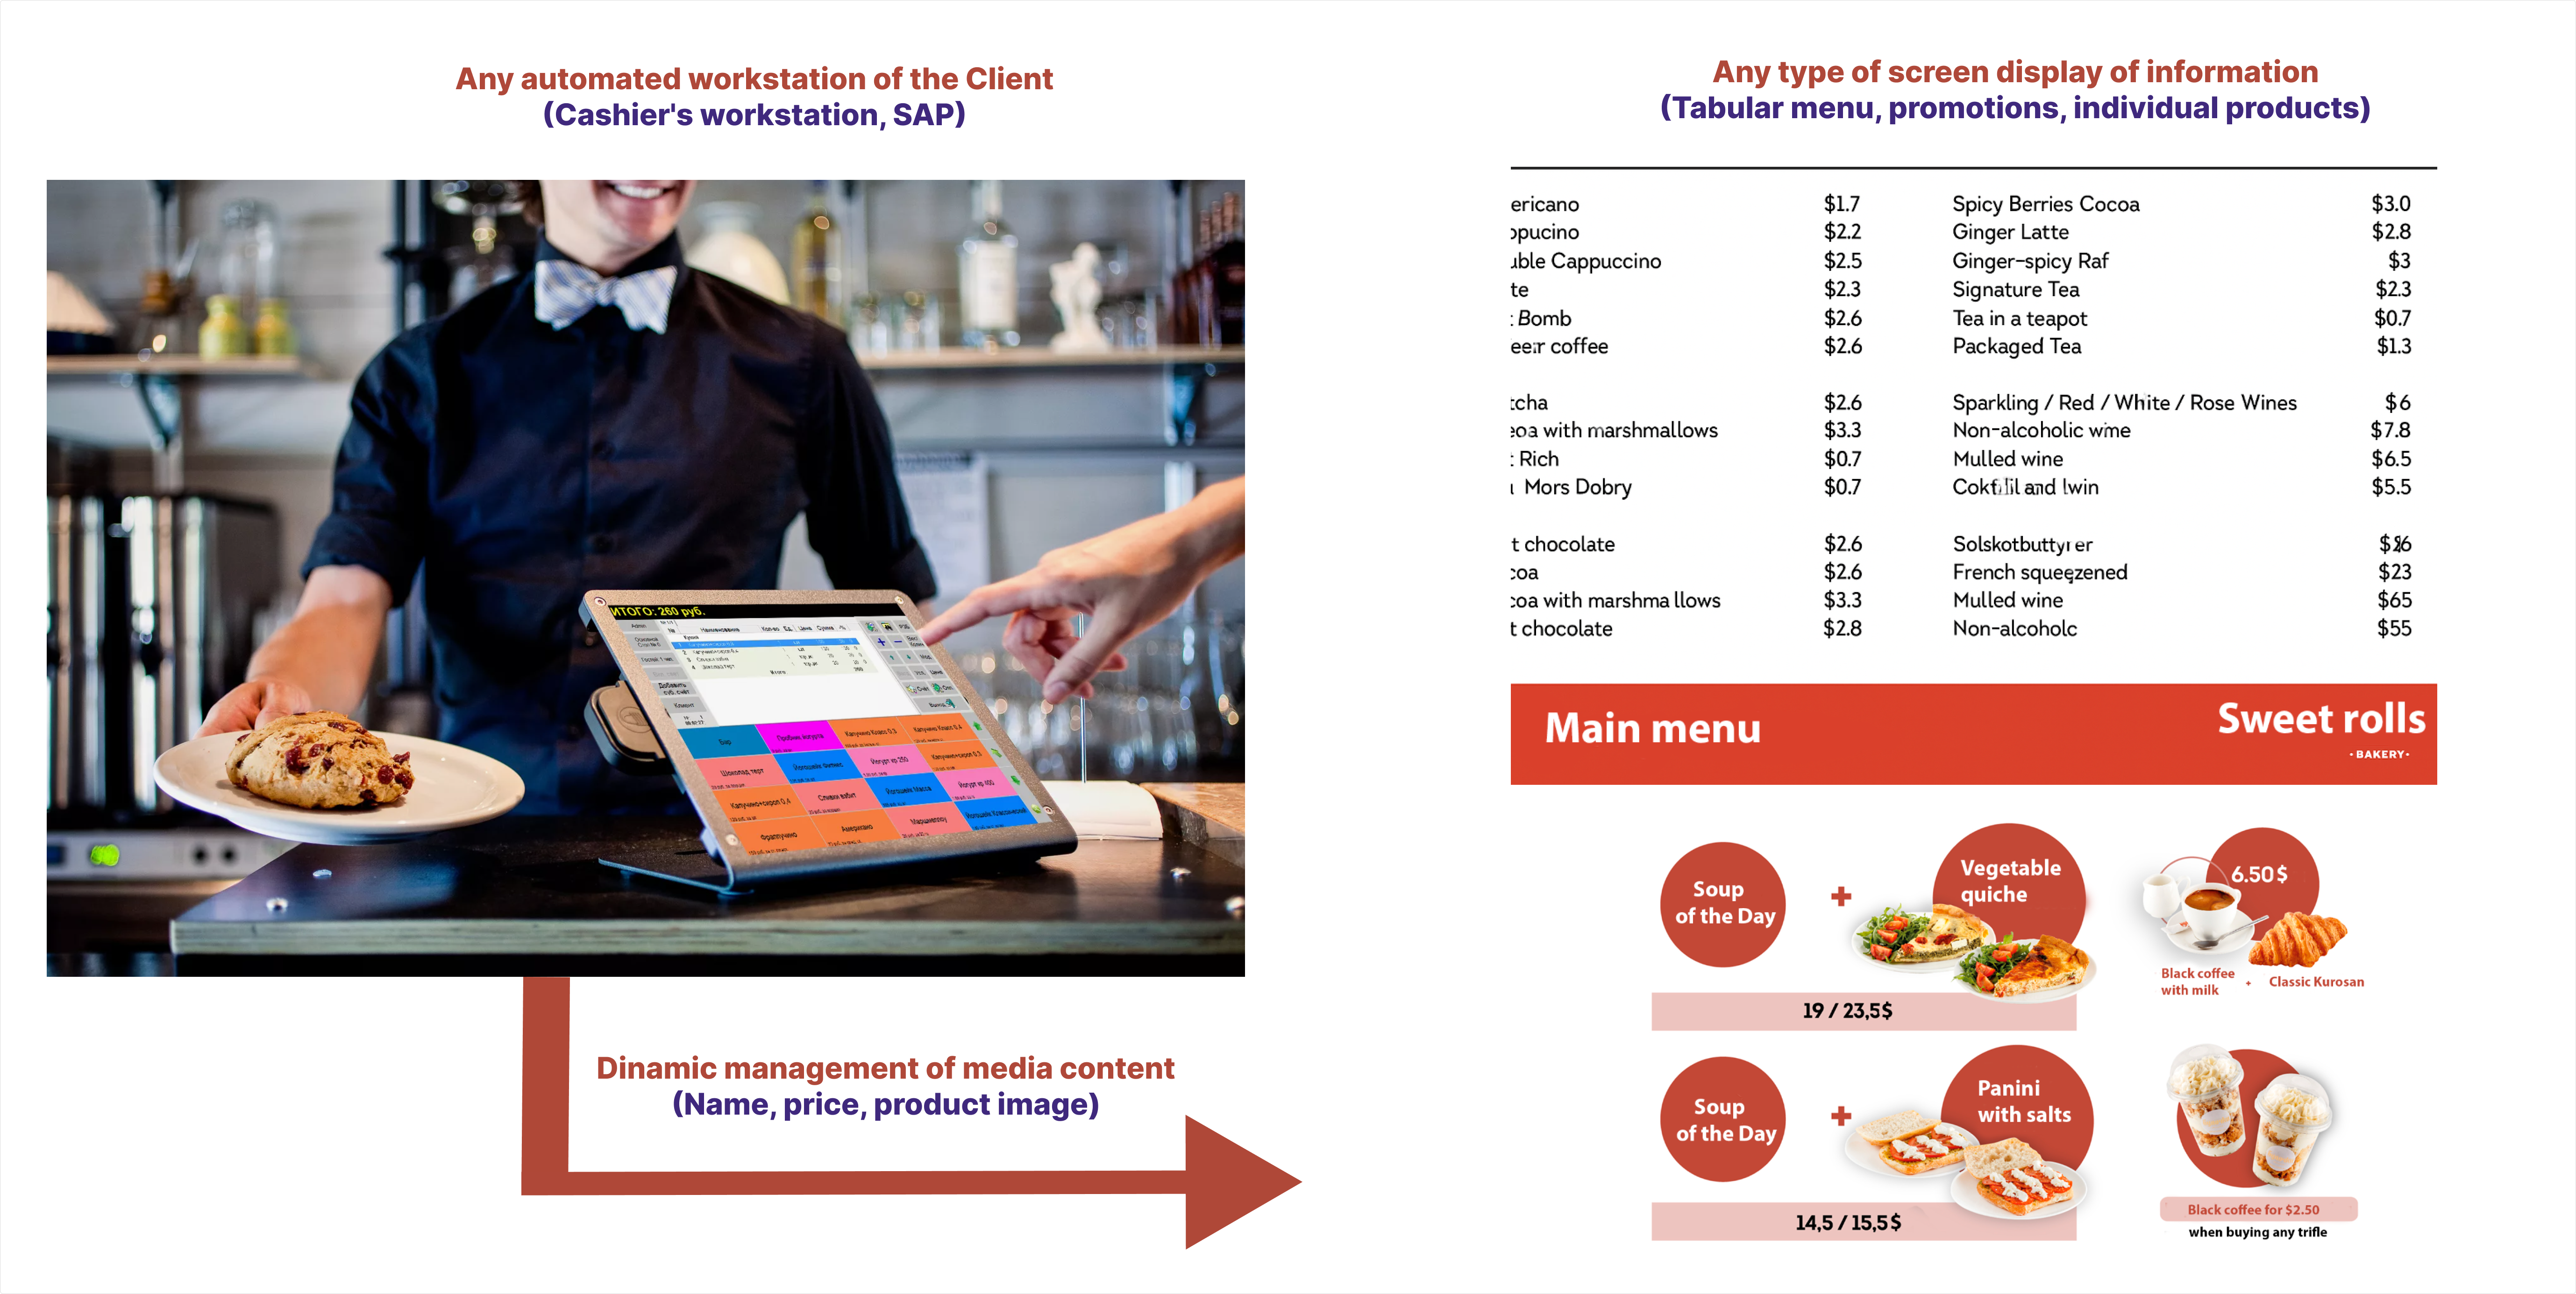
Structural Diagram of Dynamic Media Content Management
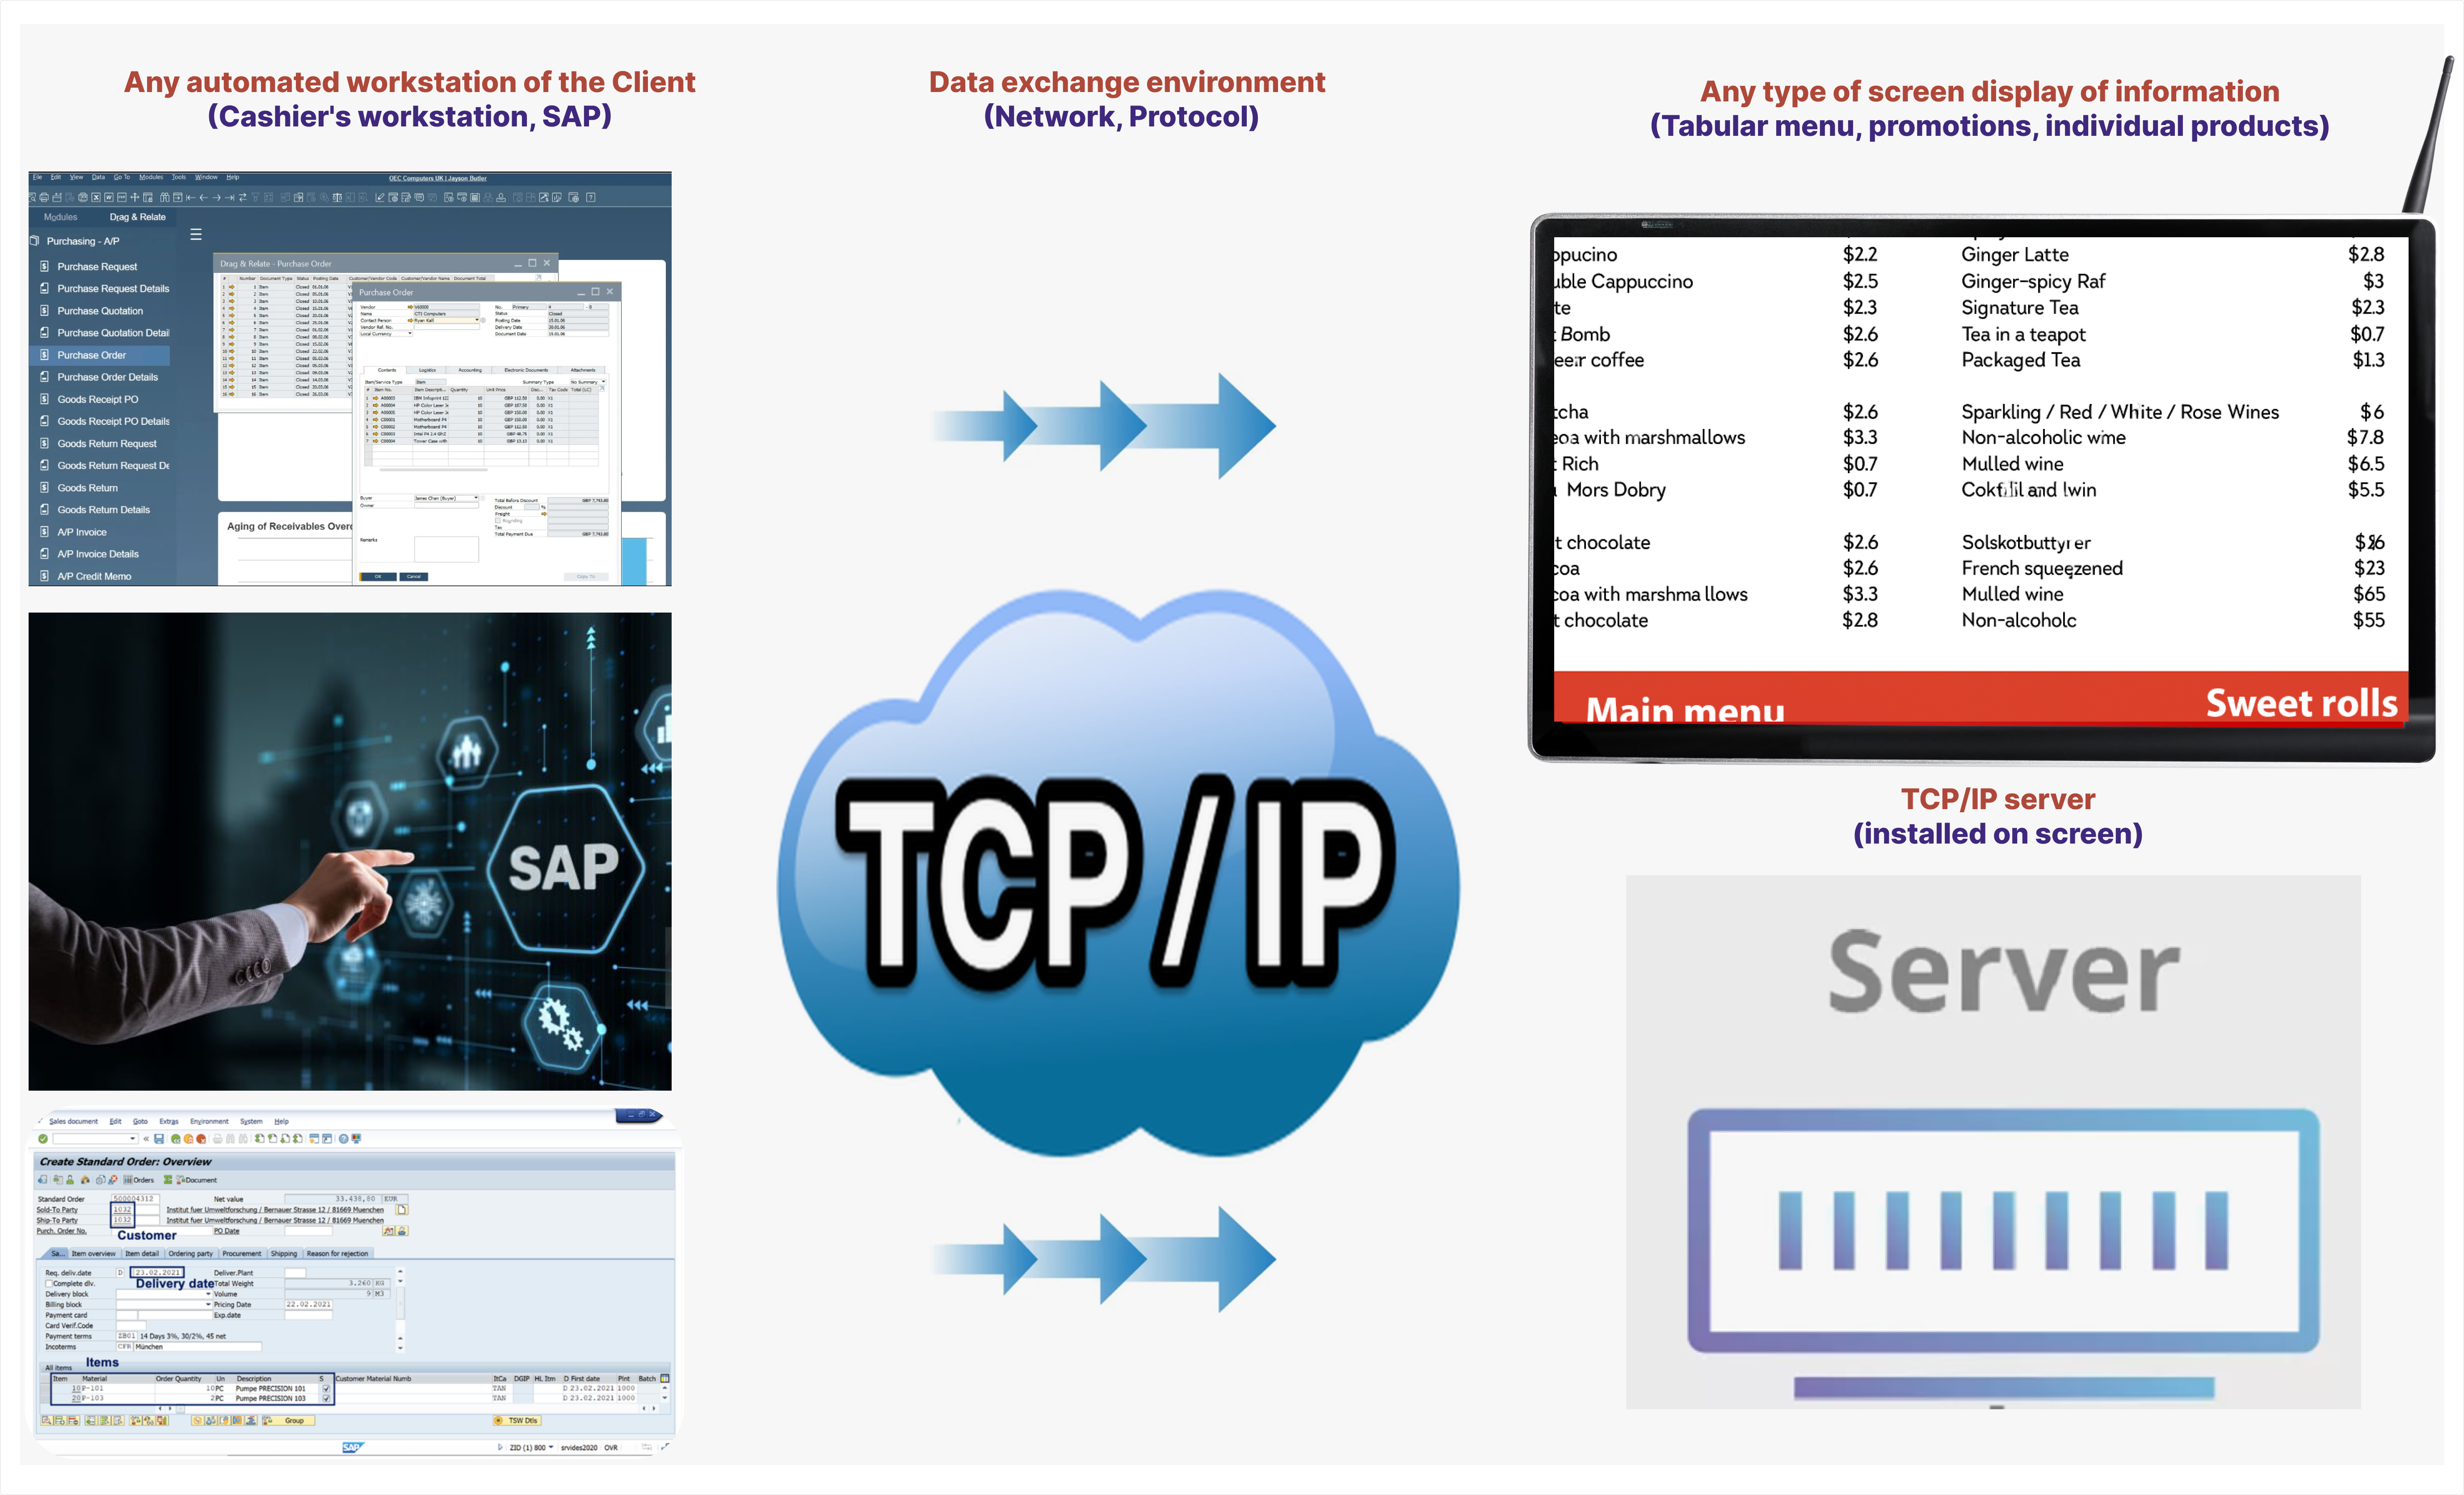
Advantages of Dynamic Media Content Management:
- Timely updates – product and service data are updated automatically without the need for manual content uploads.
- Flexible control – quickly make changes to prices, descriptions, and other parameters without complex editing processes.
- Time and resource savings – eliminates the need to create and upload new content for every information change.
- Error reduction – automatic updates minimize the risk of outdated or incorrect information.
- Centralized control – manage content across multiple screens from a single software interface.
- Content personalization – adapt displayed information for different target audiences and external factors (time of day, seasonality, etc.).
- Enhanced marketing efficiency – quickly launch promotions, update offers, and advertise products.
- Compatibility with other systems – integrates with CRM, ERP, and other business applications for automated data exchange.
- Cost optimization – reduces expenses on printing and distributing static advertising materials.
- Increased customer engagement – dynamic content attracts more attention from visitors (customers).
CRS Widget
The CRS widget is a specific case of dynamic menu technology.
CRS Widget Configuration
Involved Devices
1. Automated Cashier Workstation (POS Terminal)
Generates data for display: products, discounts, prices, etc. Uses a *.json file whose structure is defined together with the customer during implementation.
Example of a *.json File
*.json
2. Device with a configured interface (tablet, screen)
The device that will display information for the customer.
2.1 In the Devices menu – select the device.

2.2 Click on the screen display – to enter settings.
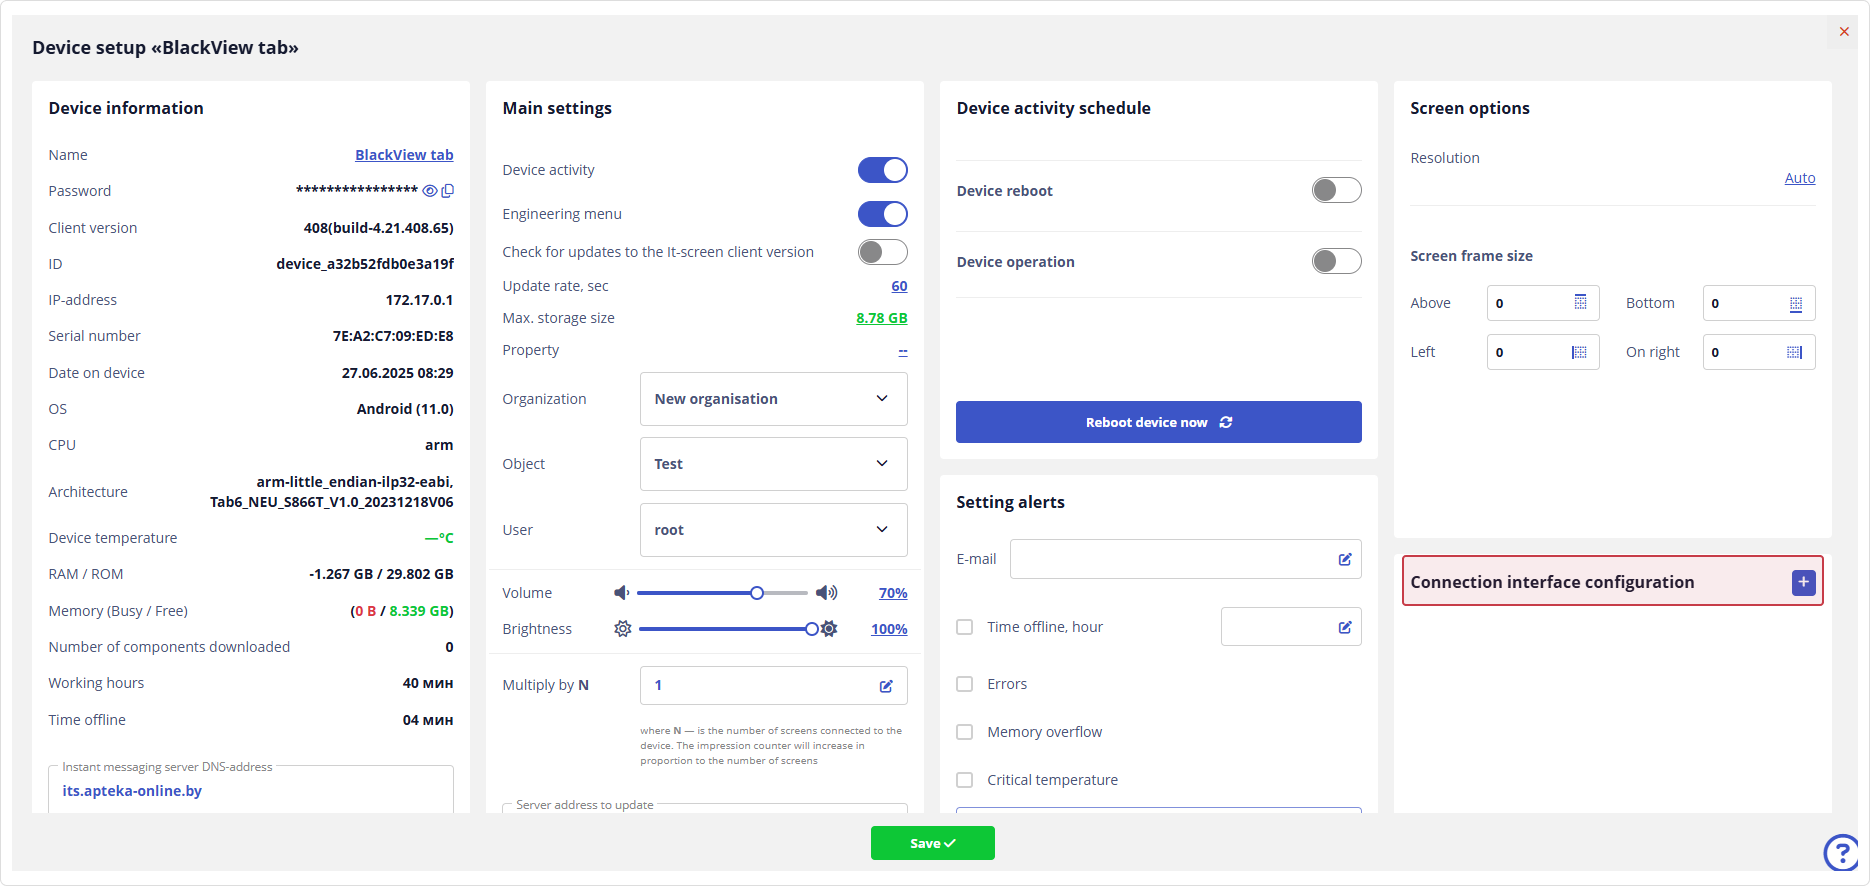
2.3 In the Connection Interface Configuration section, click , then select
2.4 Configure the interface according to the agreed protocol:
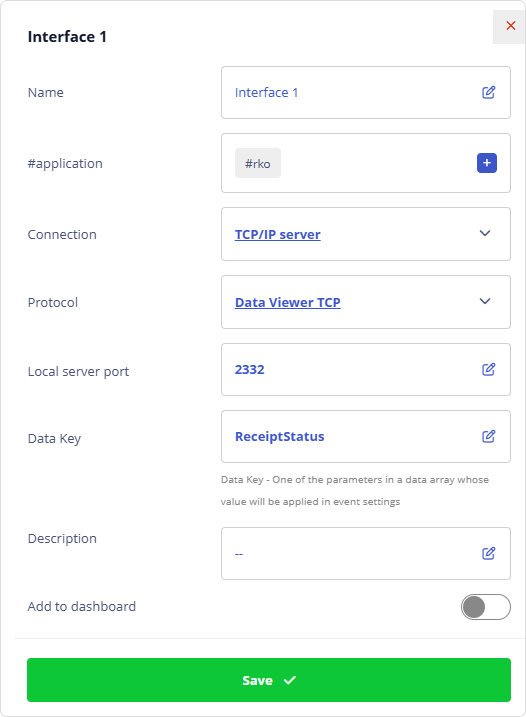
- Name: default Interface 1
- #application tag used to bind with the CRS karmic
- Connection – TCP/IP server. This means the device will launch a TCP/IP server to exchange data with the POS Terminal
- Protocol – Data Viewer TCP – the data exchange protocol
- Local server port – 2332 – any port using the TCP/IP protocol
- Key (Data Key) – ReceiptStatus – key from the
*.jsonfile ("ReceiptStatus":"Create"), indicating the presence of data exchange between POS Terminal and the Device
2.5 Save changes
3. Create a window for CRS
The window must be new and have a high Z-order. It is not recommended to reuse existing windows.
Create the window in the Layouts menu.
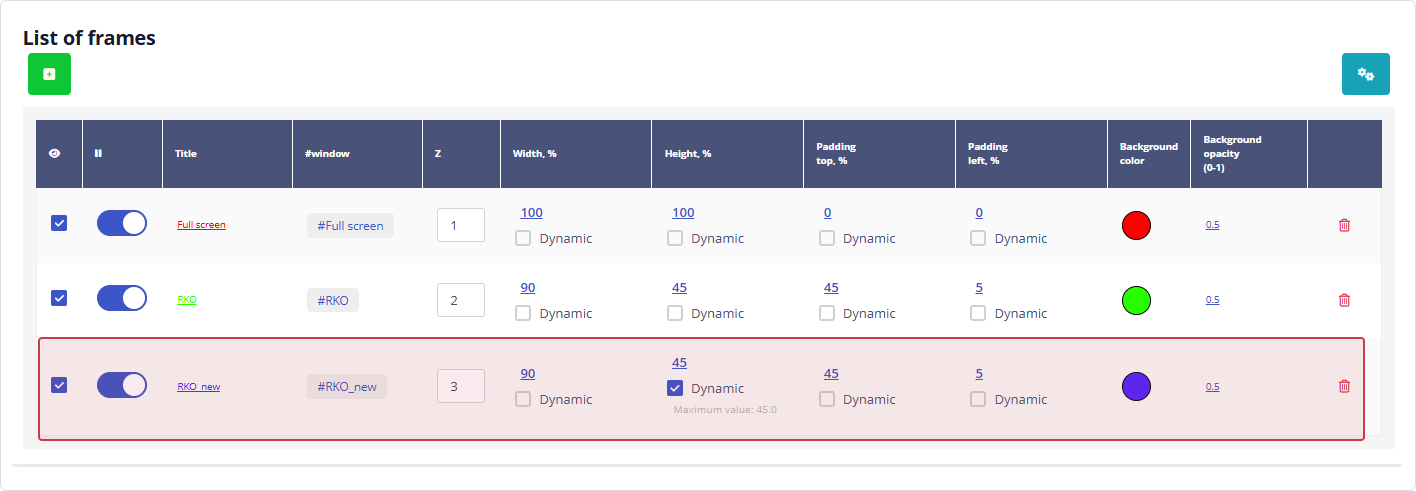
Use the maximum Z-parameter.
Use a dynamic window height — this eliminates empty areas ("gray bars").
| Static Window | Dynamic Window |
|---|---|
 |  |
4. Create a karmik
4.1 Create a karmik
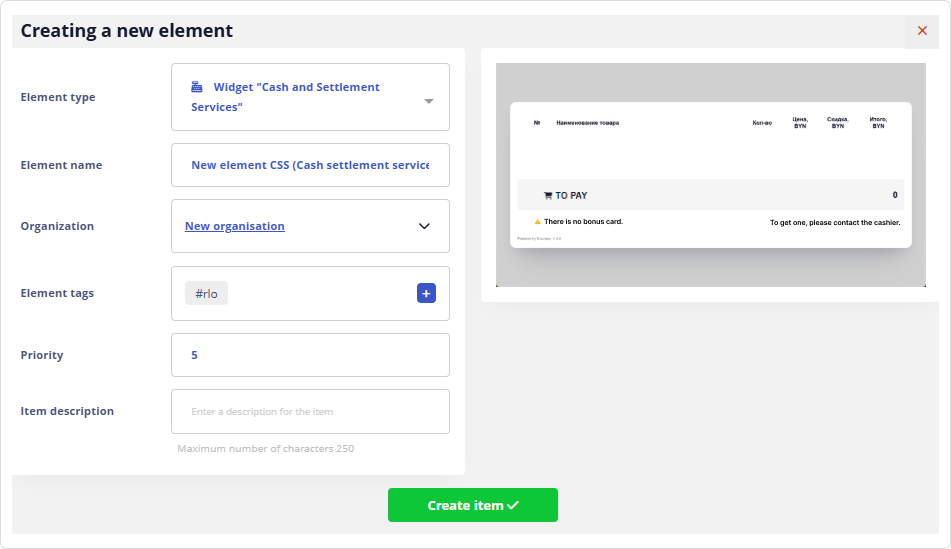
4.2 Add the CRS Widget component, assign the appropriate tags and window
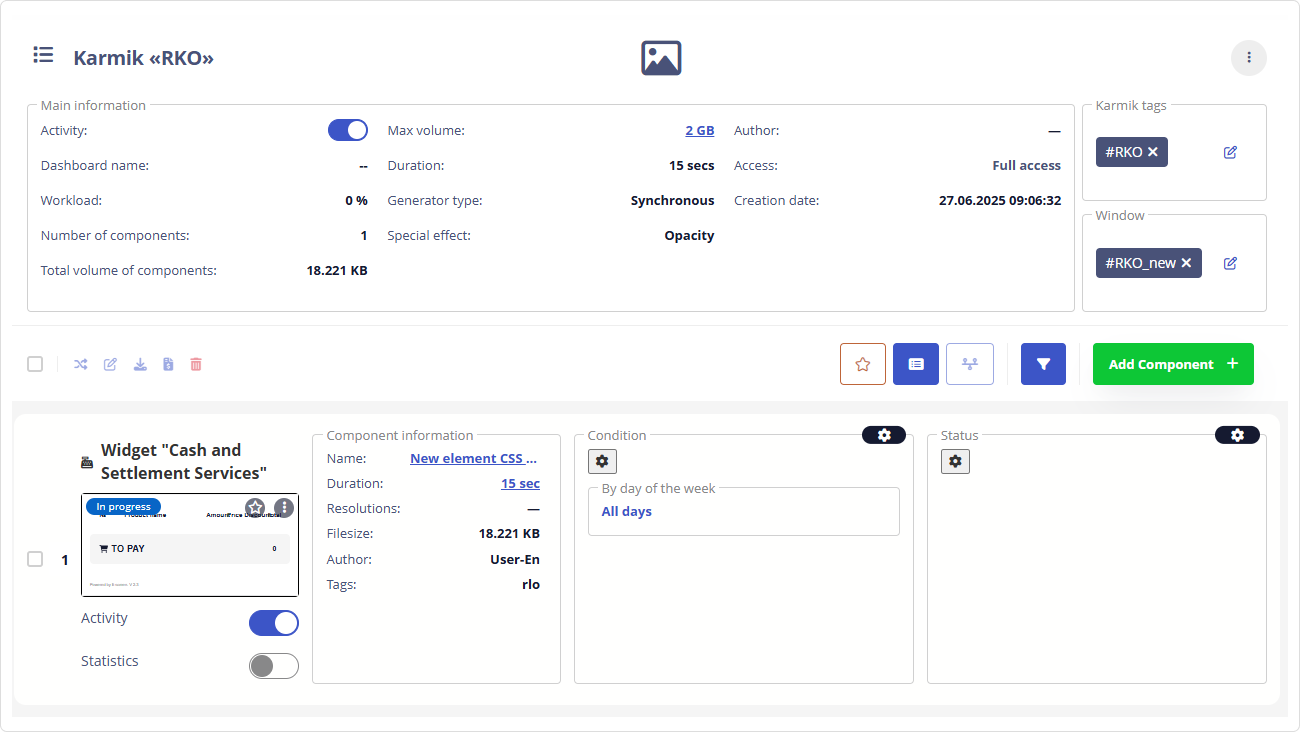
4.3 Configure the required event Sensor:
- Start: value
Create– the value of theReceiptStatusparameter that triggers the CRS widget to start - Stop: value
Closed– the value of theReceiptStatusparameter that ends the widget's activity - #Assignment:
#rko– tag linking the CRS karmik to the device interface
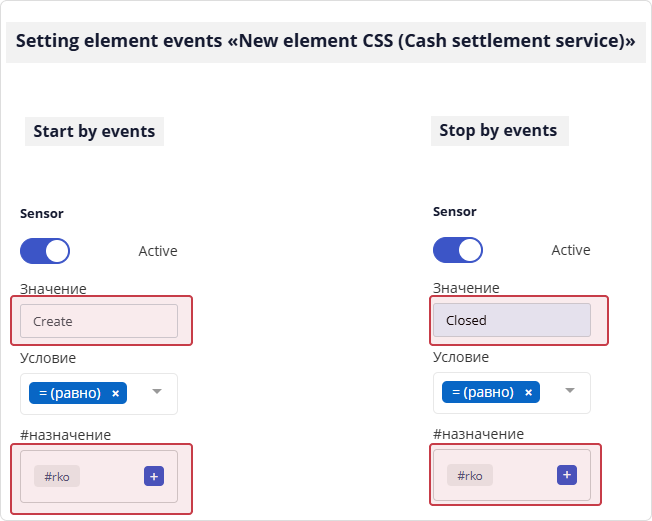
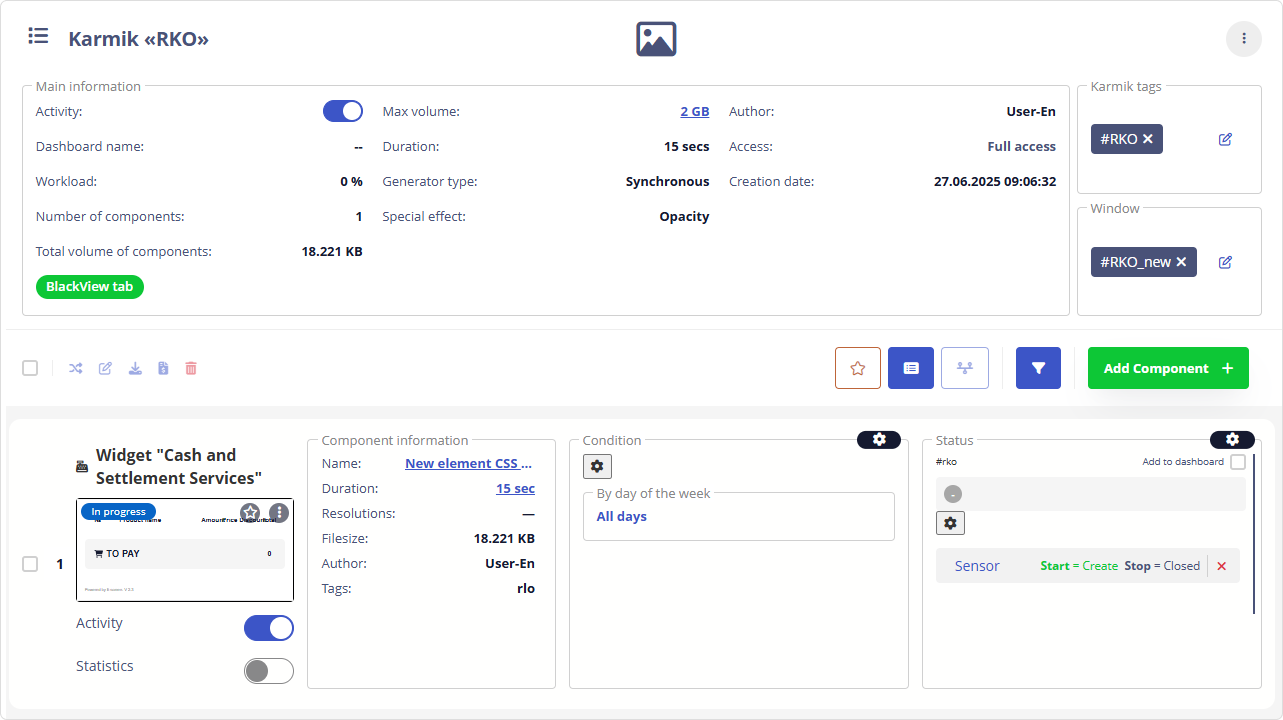
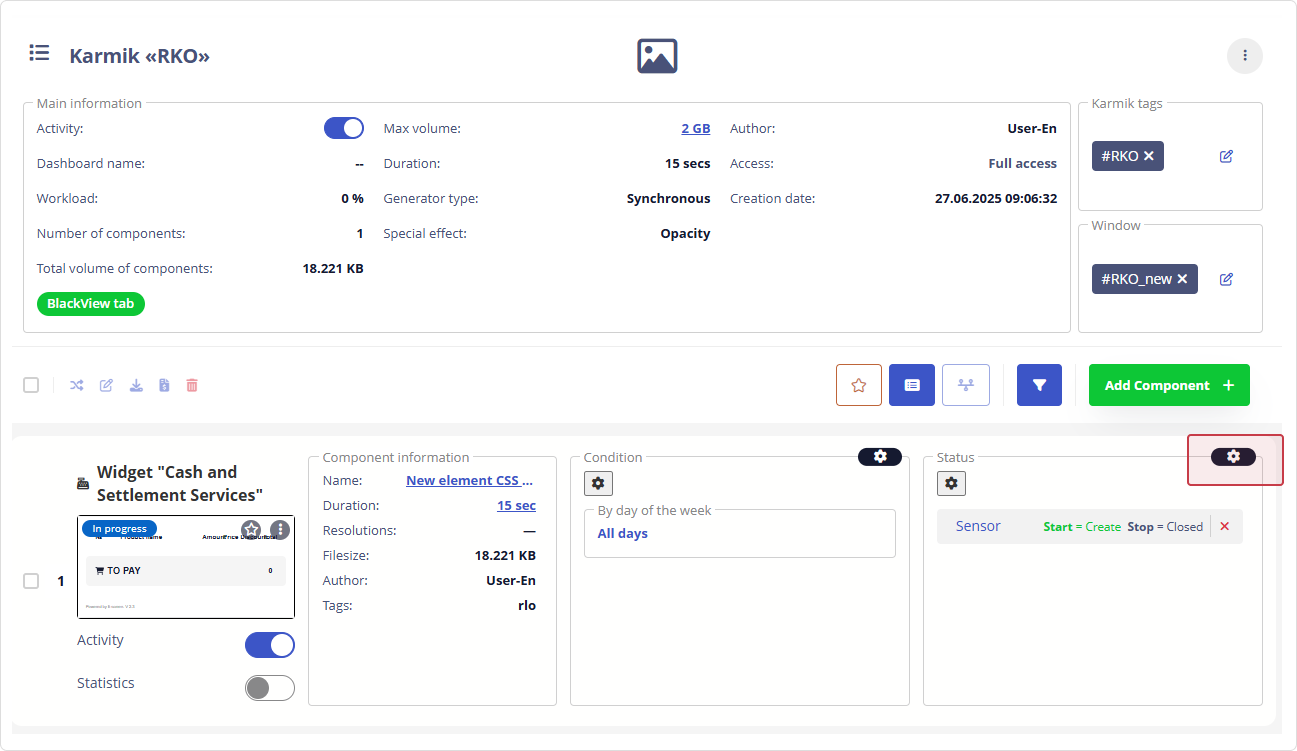
4.5 Link the karmik to the devices. Click
4.6 In the Interface Assignment window, select the required interface.
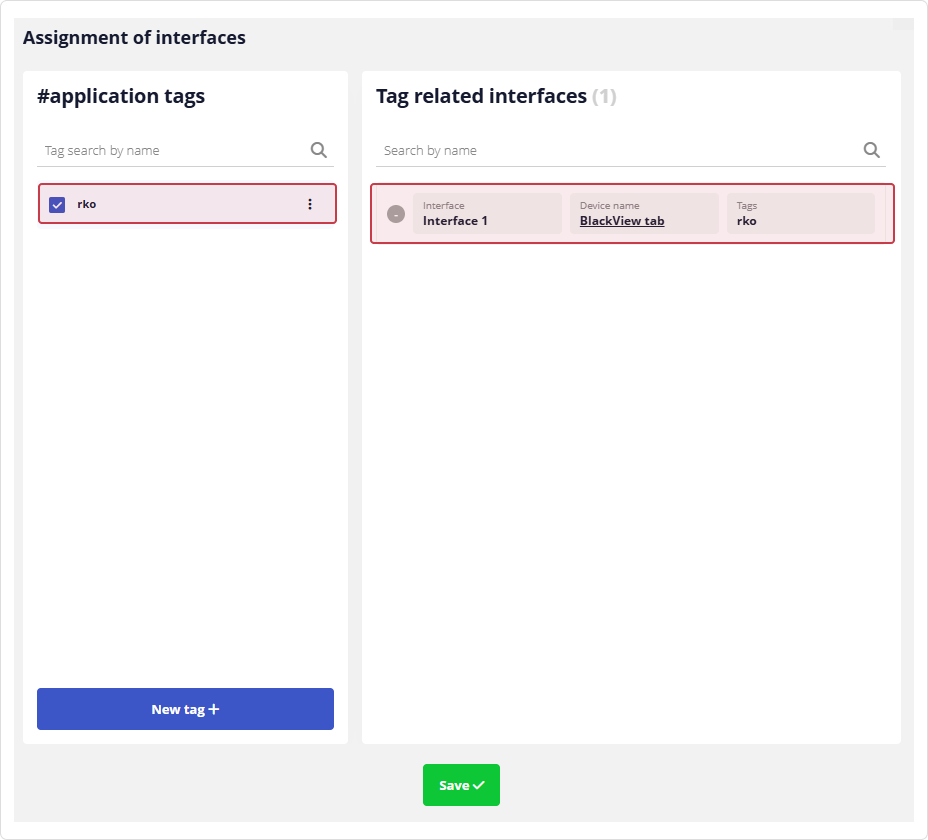
If no devices are subscribed, the list will be empty.
5. Subscribe devices to the karmik
5.1 Subscribe the devices

5.2 Verify interfaces in the karmik

Verifying CRS Functionality (for technical specialists)
Before deploying the CRS widget to production, it is recommended to test its functionality on a test device. This requires a configured device for CRS and a client program for various remote access protocols, such as the widely used PuTTY.
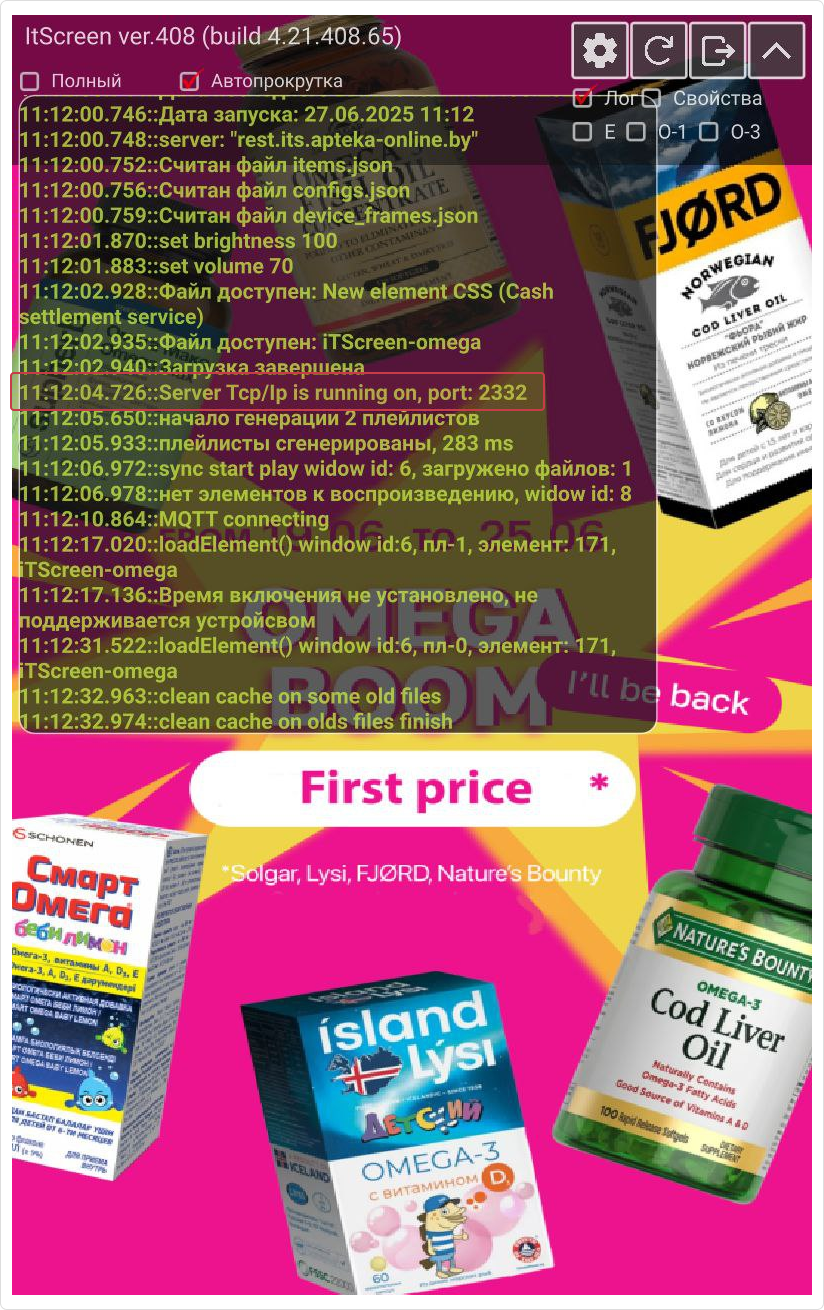
1. Ensure the TCP/IP server is running — check the logs.
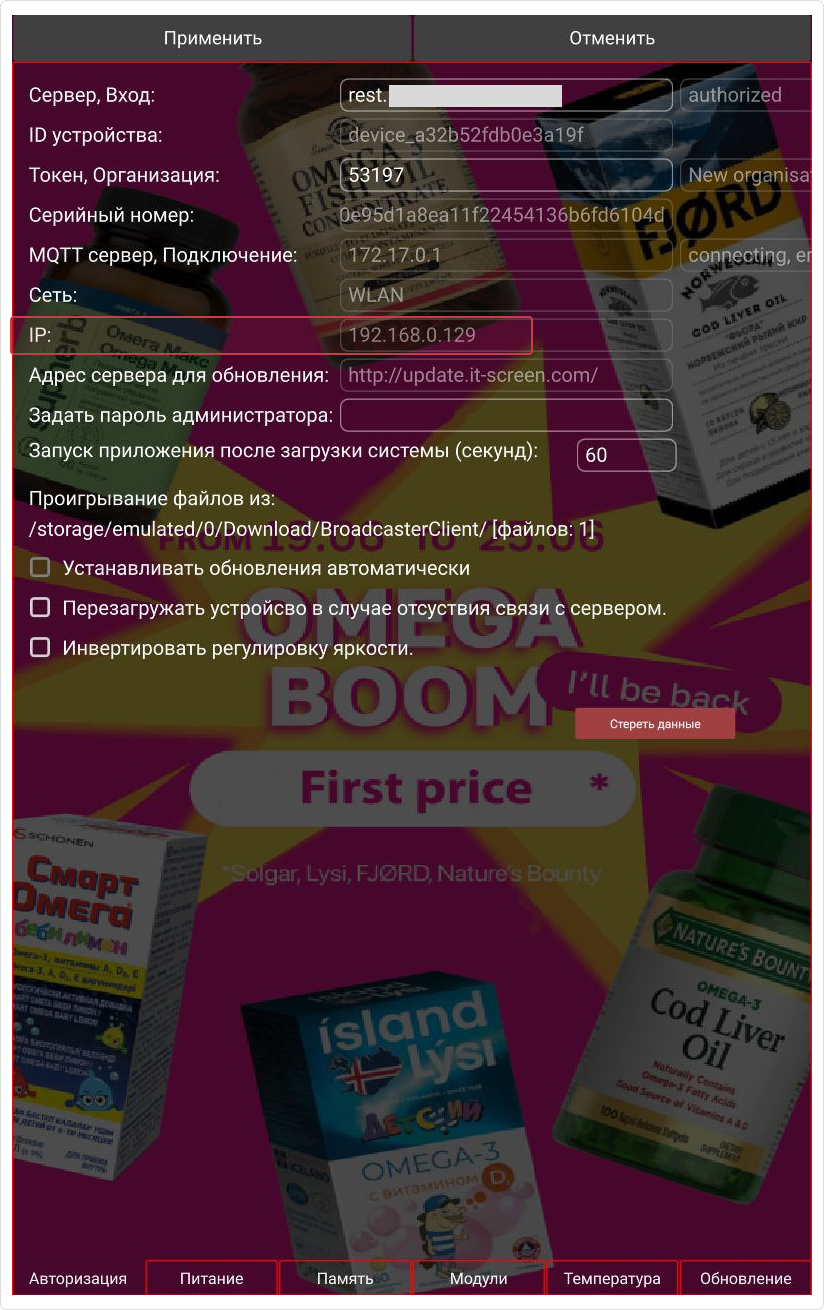
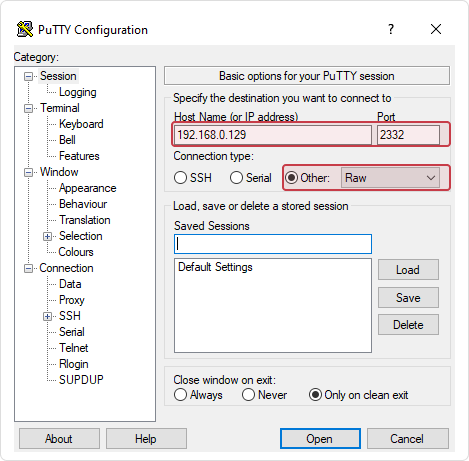
2. Connect via PuTTY (IP address, port 2332, Raw type).
The device IP address can be found in its settings.
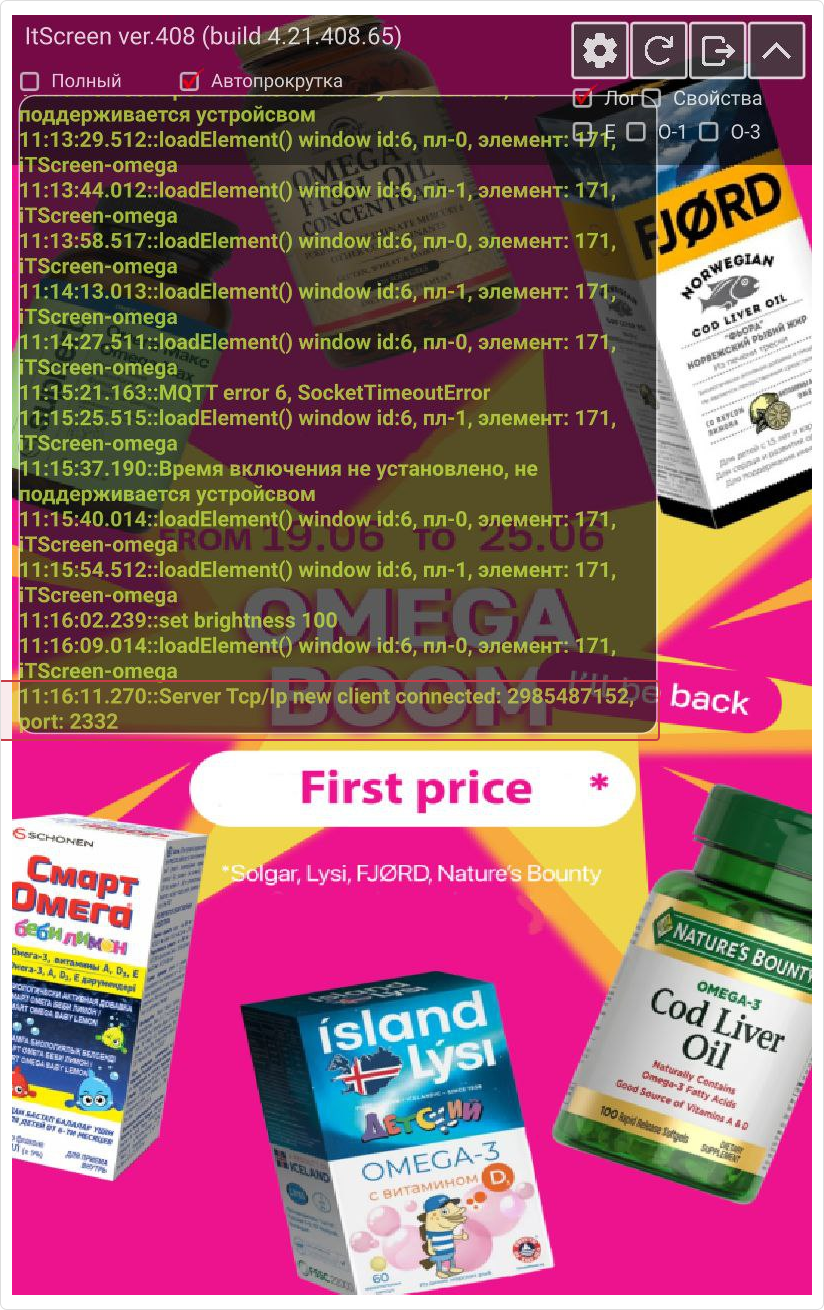
3. Check the server connection. Upon successful connection, the device log will show the corresponding entry.
4. Send the *.json file.


5. If CRS is set up correctly, the result will be displayed. The system is operational.
